After many failed attempt at creating a successful social network that people actually like, Google had finally managed to create a popular social network with Google+. Slowly but steadily, Google+ is attracting more and more users with every passing day and no doubt in the near future we could see it competing with Facebook too.
As Google + is expanding its user base, there’s an opportunity for webmasters and bloggers as well. If want to grow your connections, you should consider adding a Google+ badge to your blog or website. Not only it will help you get followers, at the same time it will also increase your blog or website’s reach to prospective readers and eventually this should help you to harness the benefits of social signals. Thus you should see your website and posts climbing up the ranks of Google search results.
For those who want to add a Google + badge on their blog or website, the following instructions would show you how to create and add a Google + badge to the sidebar widget in WordPress. However you can also use the code generated to add the Google + badge on any website regardless of the CMS used.
How to create a Google+ Badge
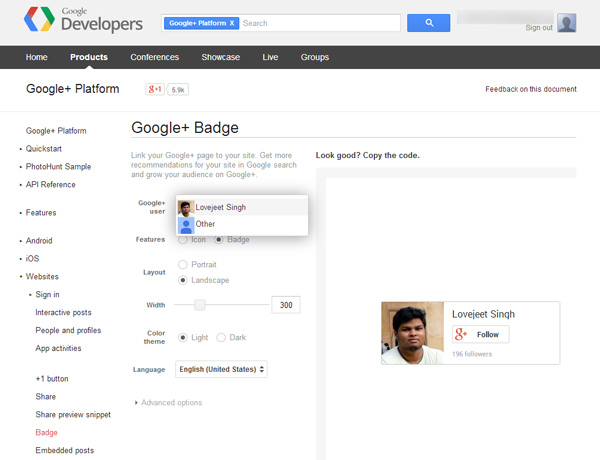
- Step 1: Head over to https://developers.google.com/+/web/badge/ in a web browser.
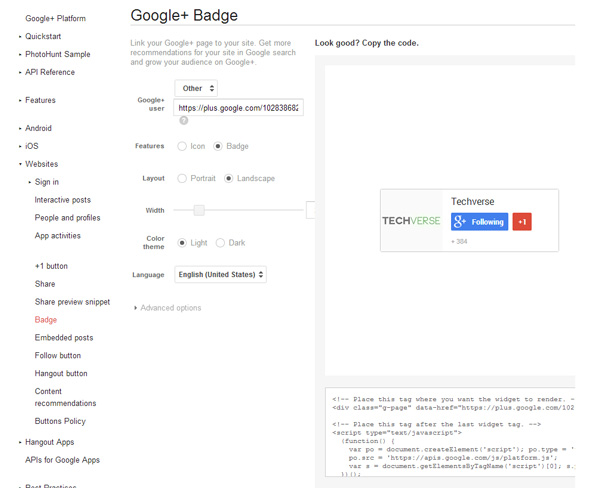
- Step 2: Click on Google + user and select your Google + account to create a Google plus badge for it. Otherwise select the Other option to create a Google + badge for your blog’s Google + page.
- Step 3: Select the Badge option beside features.
- Step 4: Next choose how you would like Google + badge to look like. I have decided to go with the landscape layout.
- Step 5: Now set a Width for the badge. For example: I am going to add the Google + badge to the sidebar widget of my blog, so I will set the width at 300 pixels.
- Step 6: Choose from the dark or light color theme and select a language.
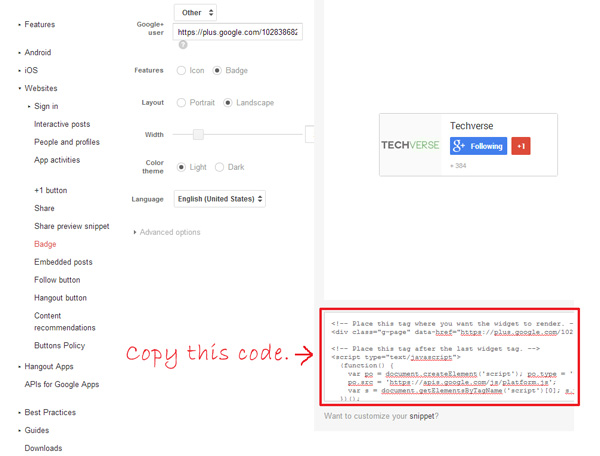
- Step 7: Finally you can copy the code provided and use it on your blog.
Adding the code to a sidebar widget in WordPress
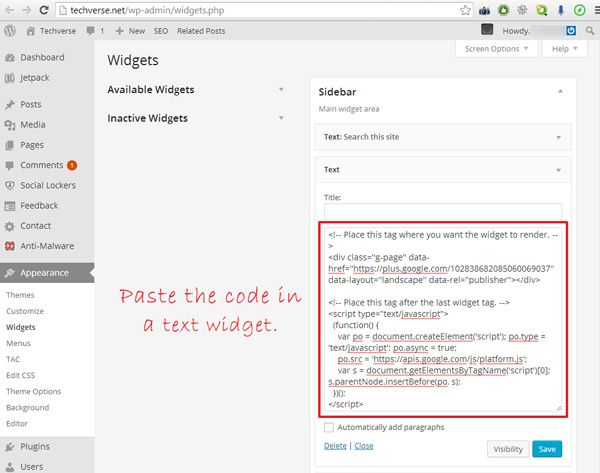
If you have your blog hosted on a WordPress, you can paste the copied code in a text widget and the Google + badge should be displayed on your website / blog’s sidebar.
- Step 1: Login to your WordPress dashboard and navigate to Appearances > Widgets.
- Step 2: Drag a text widget to the sidebar and paste the code in it. Click on save and the Google + badge would have appeared on your blog’s sidebar.
That’s it and now the Google + badge should appear on the sidebar of your WordPress blog or website. If you have any doubts, feel free to ask them in the comments below.


very nice information ,it’s more help to me.
thanks & regards
A-Care