Lately many websites and services on the internet have been blocked by governments across the globe in order to regulate the internet. If a website gets blocked by the government, the internet service providers have to mandatorily comply with the orders and restrict access to it.
Web services like Netflix, Spotify, iTunes and many more have to restrict access to their services in certain countries due to licensing regulations. This is another case where many in spite of being able to pay for the subscription are not able to access them. Companies are bound by legal restrictions to block access to their services in certain countries.
The internet being a decentralised platform for sharing of information, it is not controlled by a single entity. So the government or any company can only impose a country wide block on a website or service. Which means, any website that is blocked in your country might be accessible in your neighbouring country, unless it is also blocked in that country.
But the fact is, any blocked website or service can be easily accessed by using a VPN service. All you need to do is, subscribe to a VPN service and install their app to get instant access to any blocked website or service. In addition to that, VPN also provides anonymity to the user when browsing the internet, which is one of the major use cases of VPN, apart from unblocking websites and services.
However, VPN service providers keep a log of the websites or services used by you. If the VPN service gets compromised or gets a request from a legal authority to reveal any users details, your browsing details will be exposed. So subscribing to a VPN service does help you with accessing blocked sites and services, but on the other hand you do not get true privacy.
So how can ensure true privacy while browsing blocked websites and services?
The answer is simple, you can set up your own VPN server for personal use using one of the many open source VPN tools available. For example, OpenVPN is one such open source VPN tool. It can be easily installed on a Linux server and your pc or mobile device can be configured to use it.
Do not worry if you are new to linux, I will go through the entire process in detail. Just follow the instructions and your own personal VPN server will be set up and ready to use within 10 minutes.
First of all you will need a linux server, preferably hosted in a country where the website or service of your choice is free to access.
For this guide, I will use Linode’s cheapest vps server which costs $5 per month. The server will be hosted in the USA. You can also find VPS servers for as low as $2 per month, but I cannot vouch for their uptime and service quality.
How to setup your own VPN server with OpenVPN
The manual installation of OpenVPN on a web server is a very complicated and lengthy process and is not user friendly at all. This is the reason why I am using linode because it allows installation of OpenVPN as an application, thus letting anyone install OpenVPN with just a single click.
Step 1: Create an account at Linode.com and log in to the dashboard.
Step 2: Click on Create to the top right of your screen and select Linode.
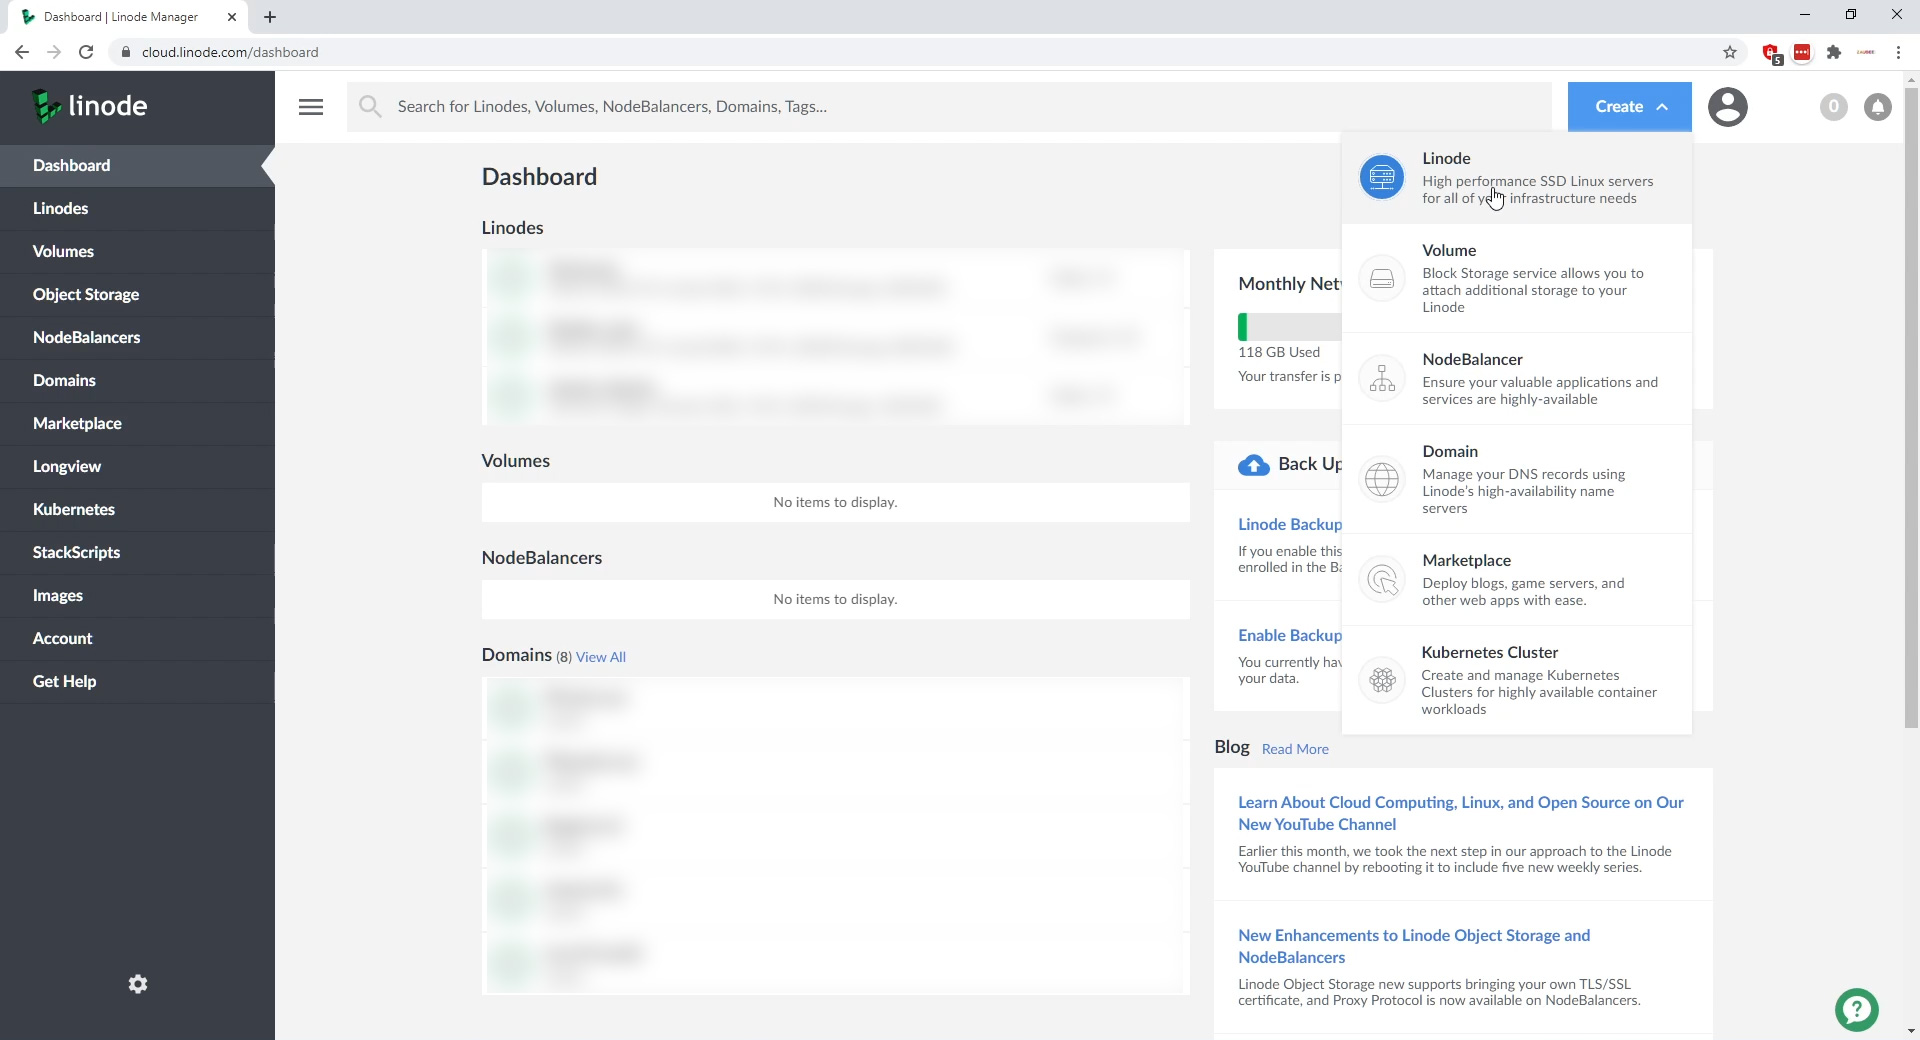
Step 3: Click on Marketplace.
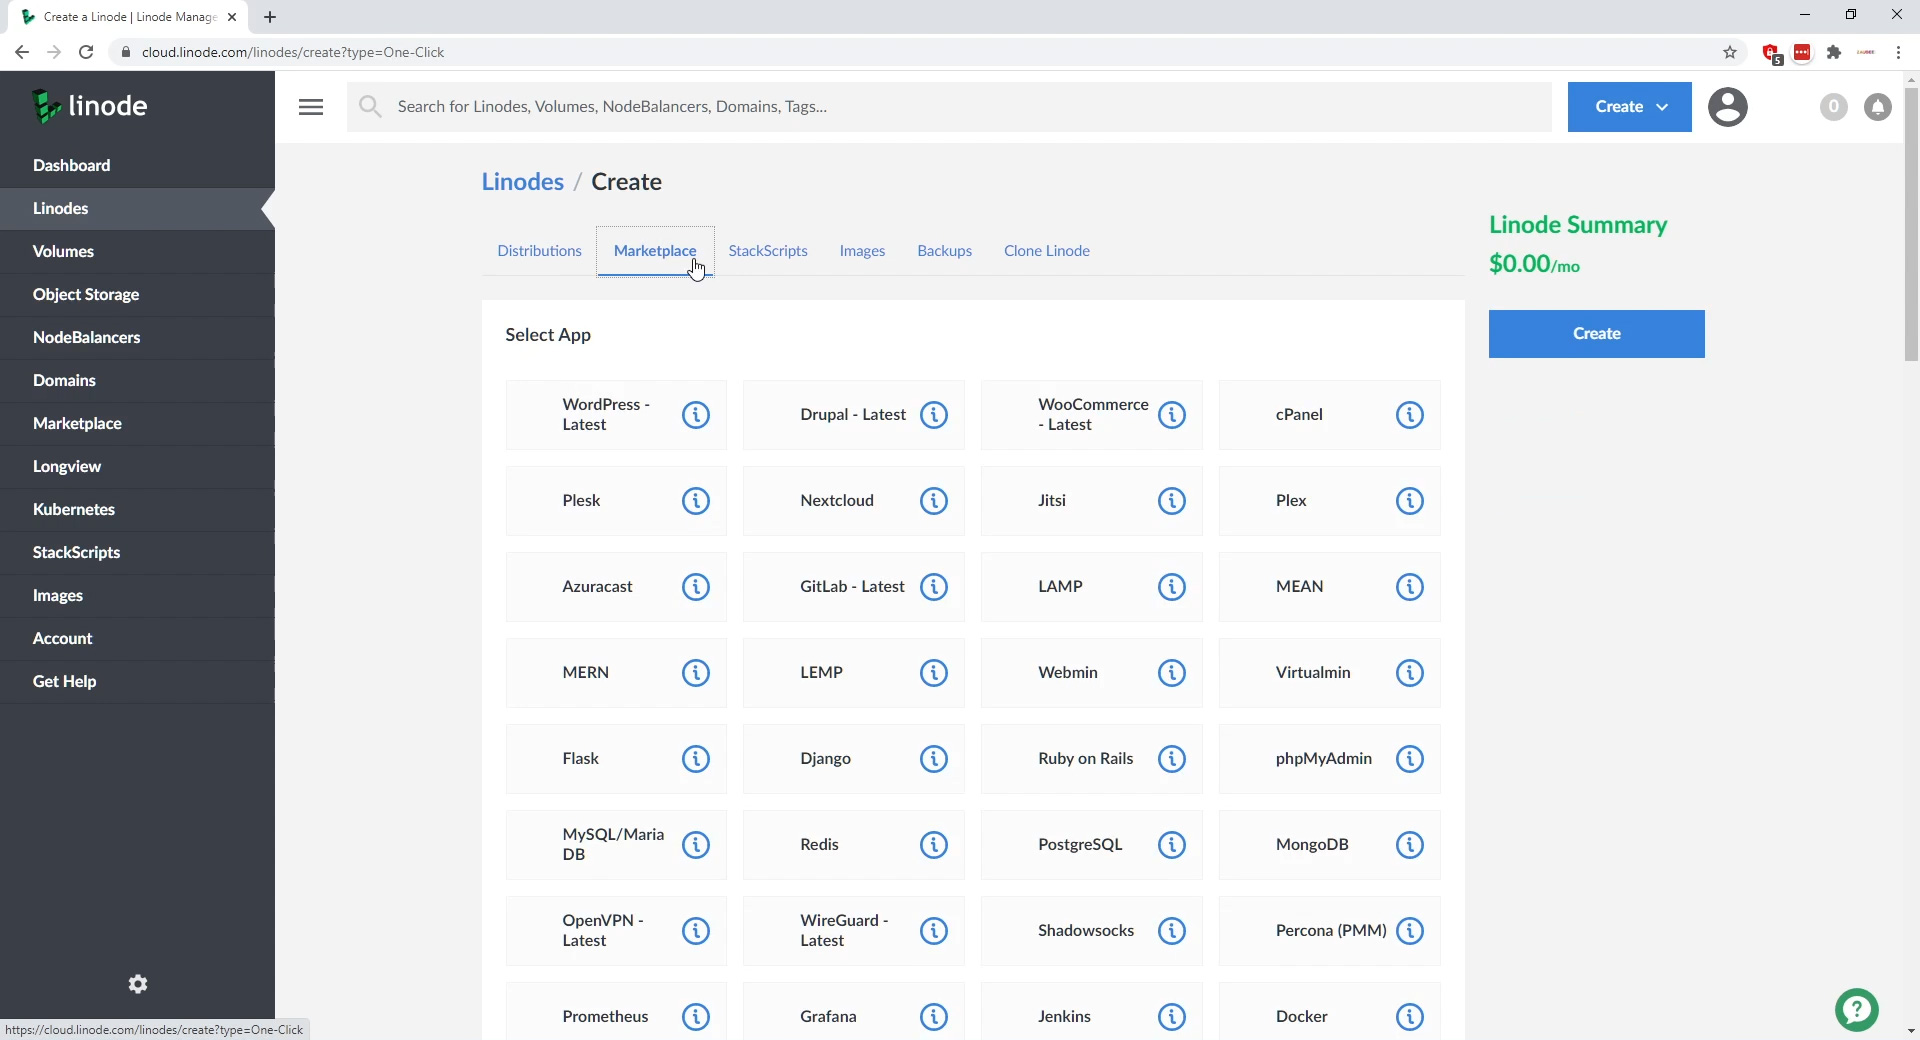
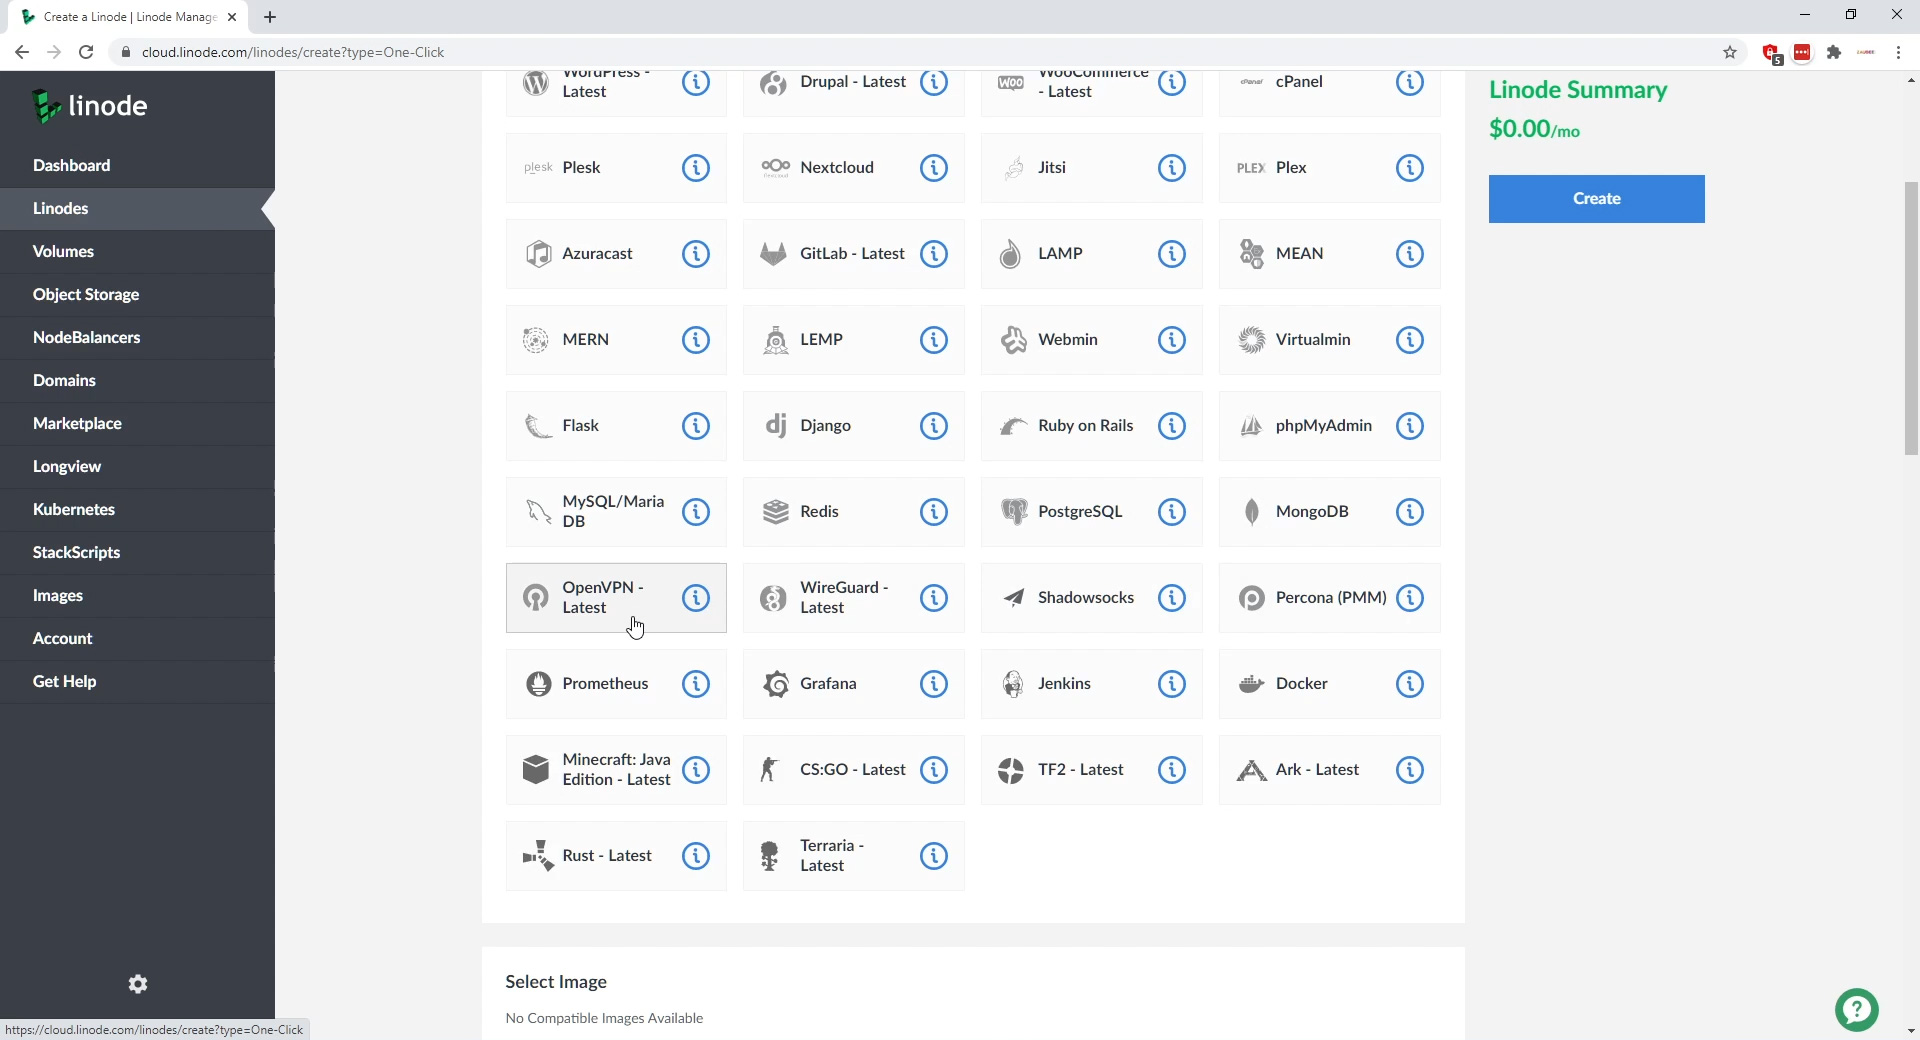
Step 4: Select OpenVPN from the list of apps.
Step 5: Enter a password for the OpenVPN installation.
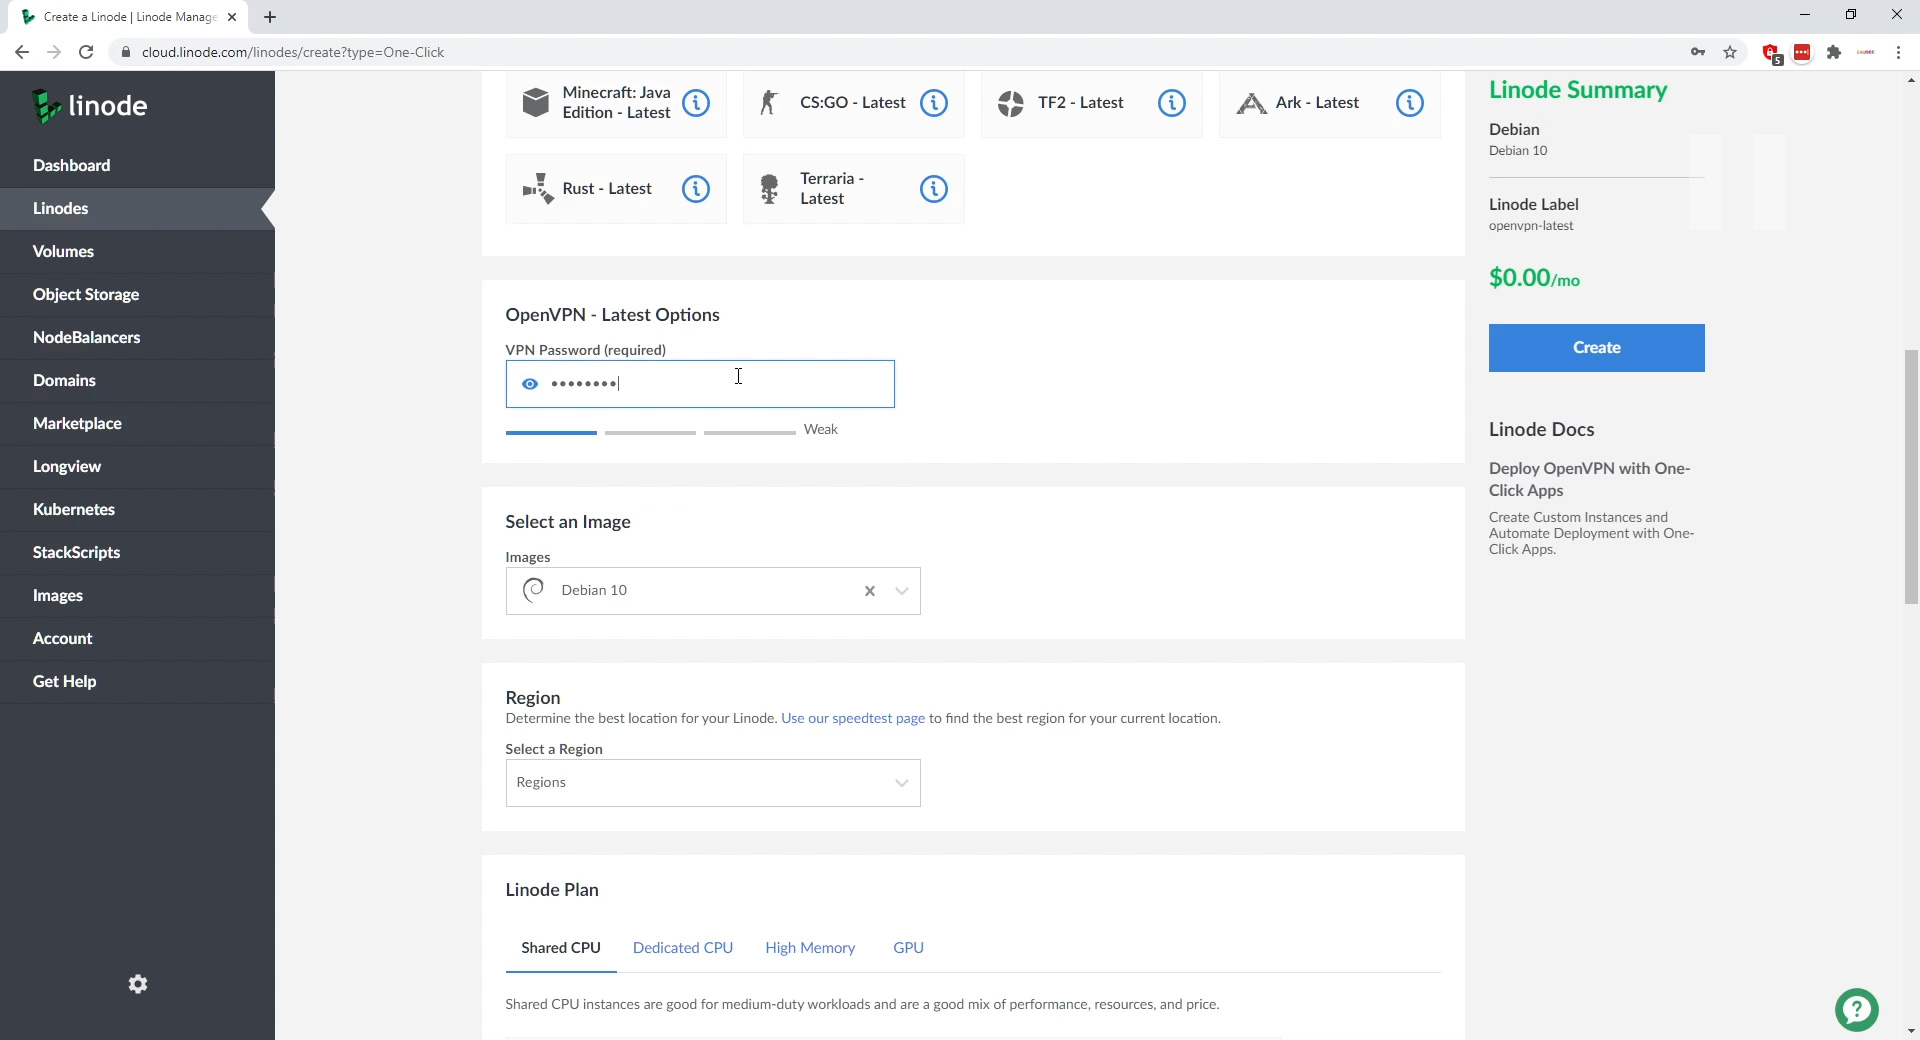
Debian will be the default OS for installation of OpenVPN on linode. This shouldn’t be an issue as we wont be touching the os.
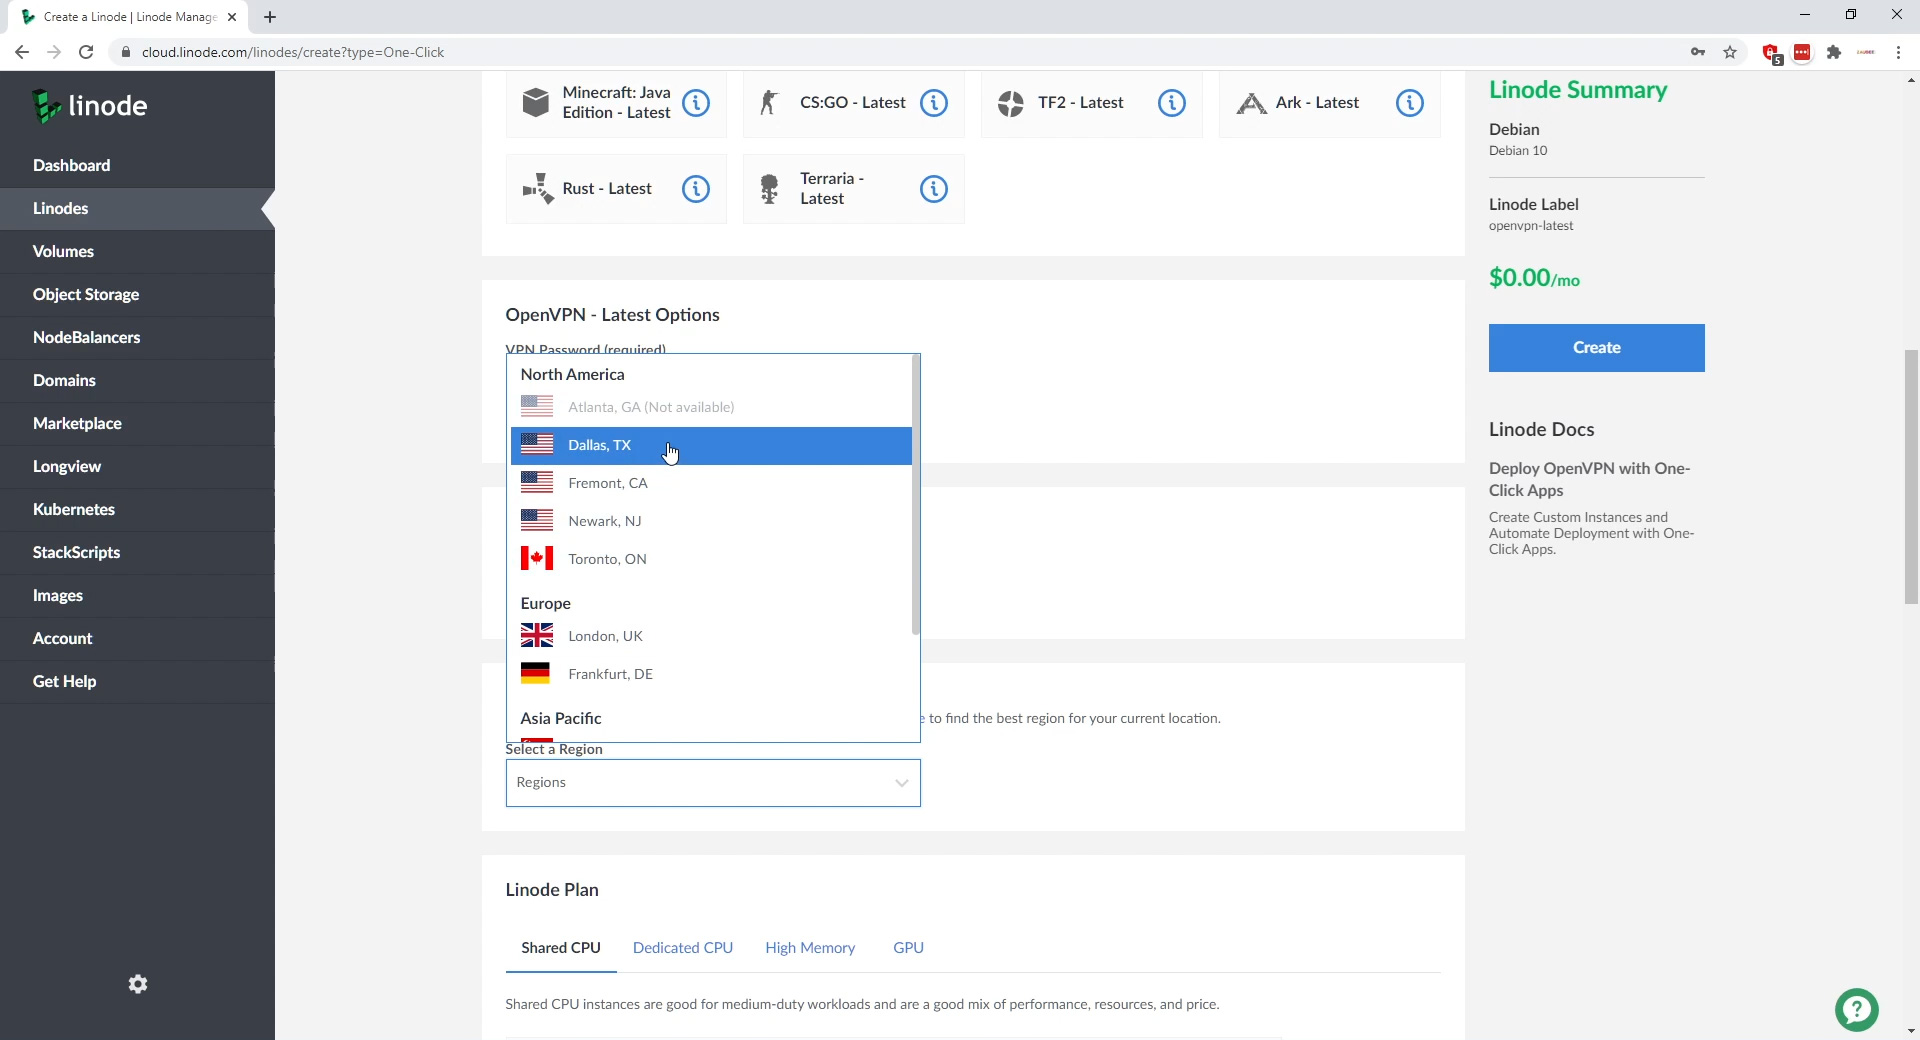
Step 6: You can choose any region you want, but I would prefer to choose a region in the USA.
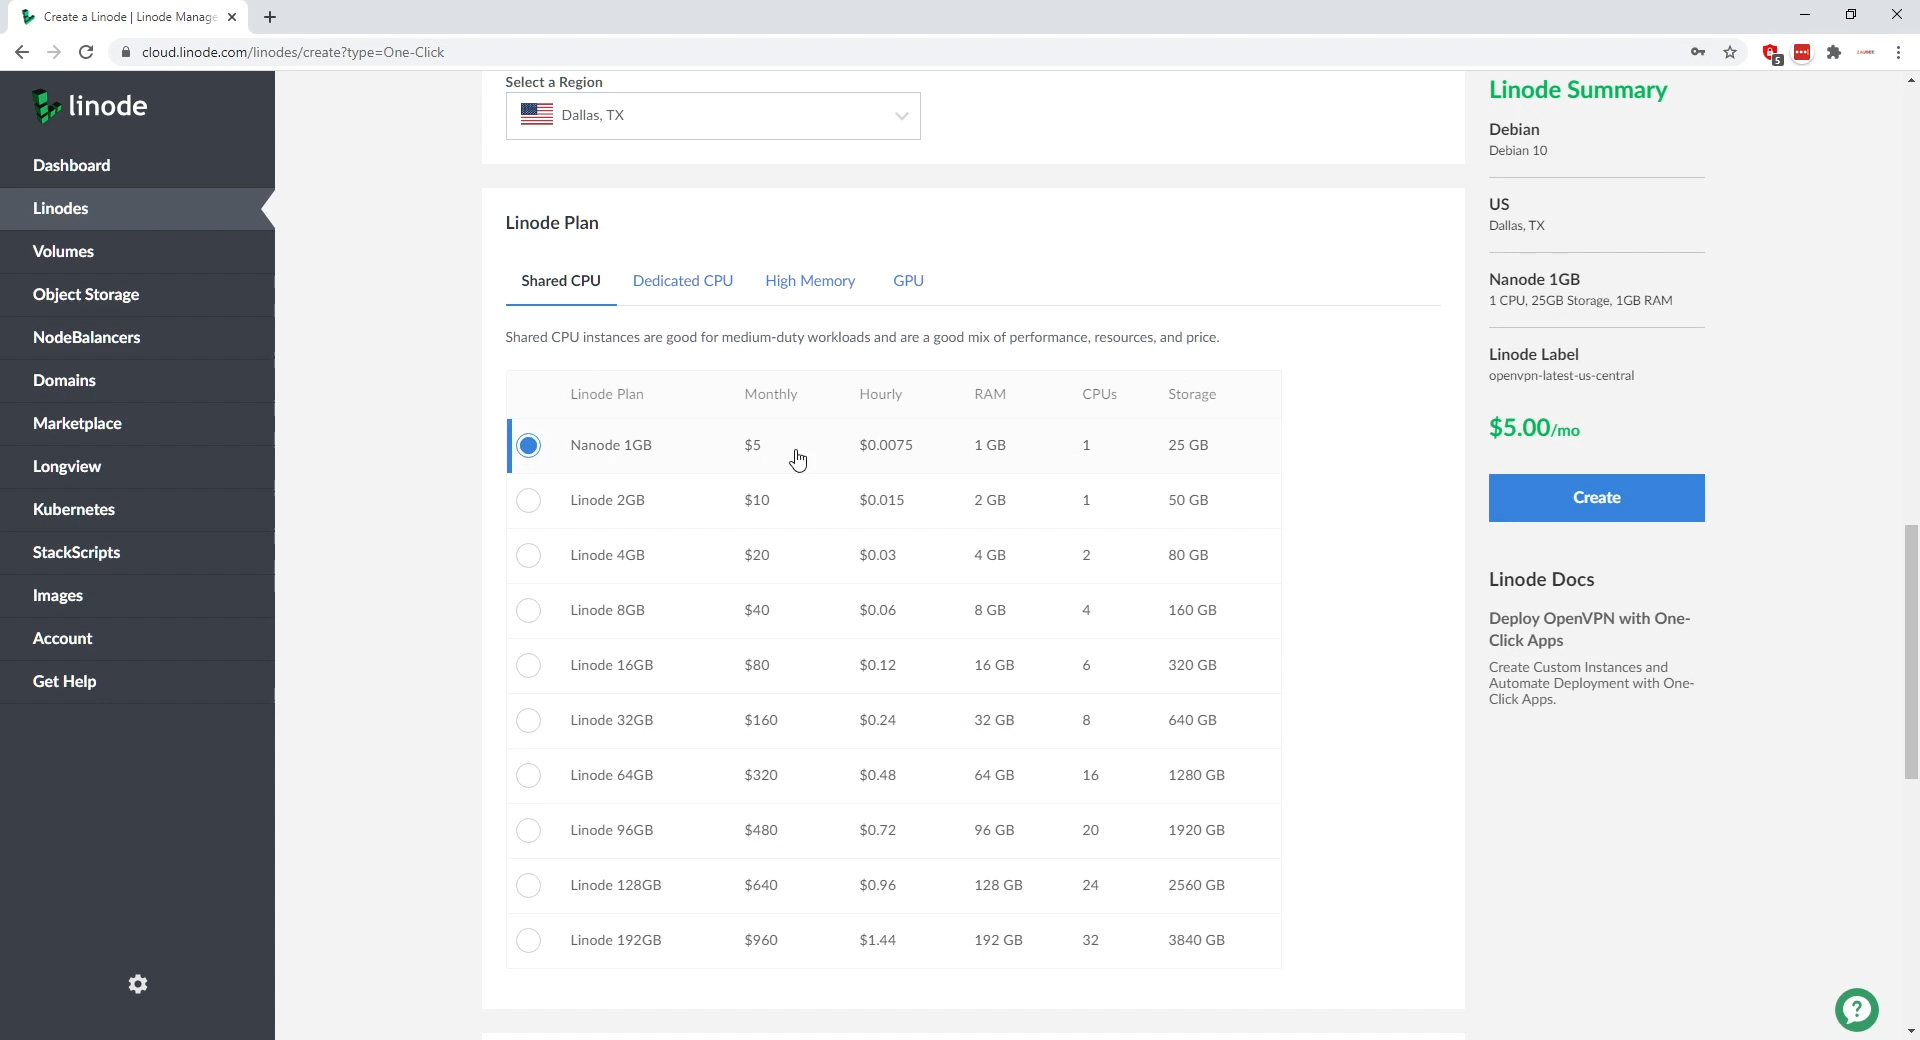
Step 7: For this guide, I will prefer to choose the nanode 1GB VPS option. It costs $5 per month and comes with 1 TB of bandwidth, which should be enough for most of us. If you need more bandwidth, you can go through the price list to check the bandwidth offered with others linode plans.
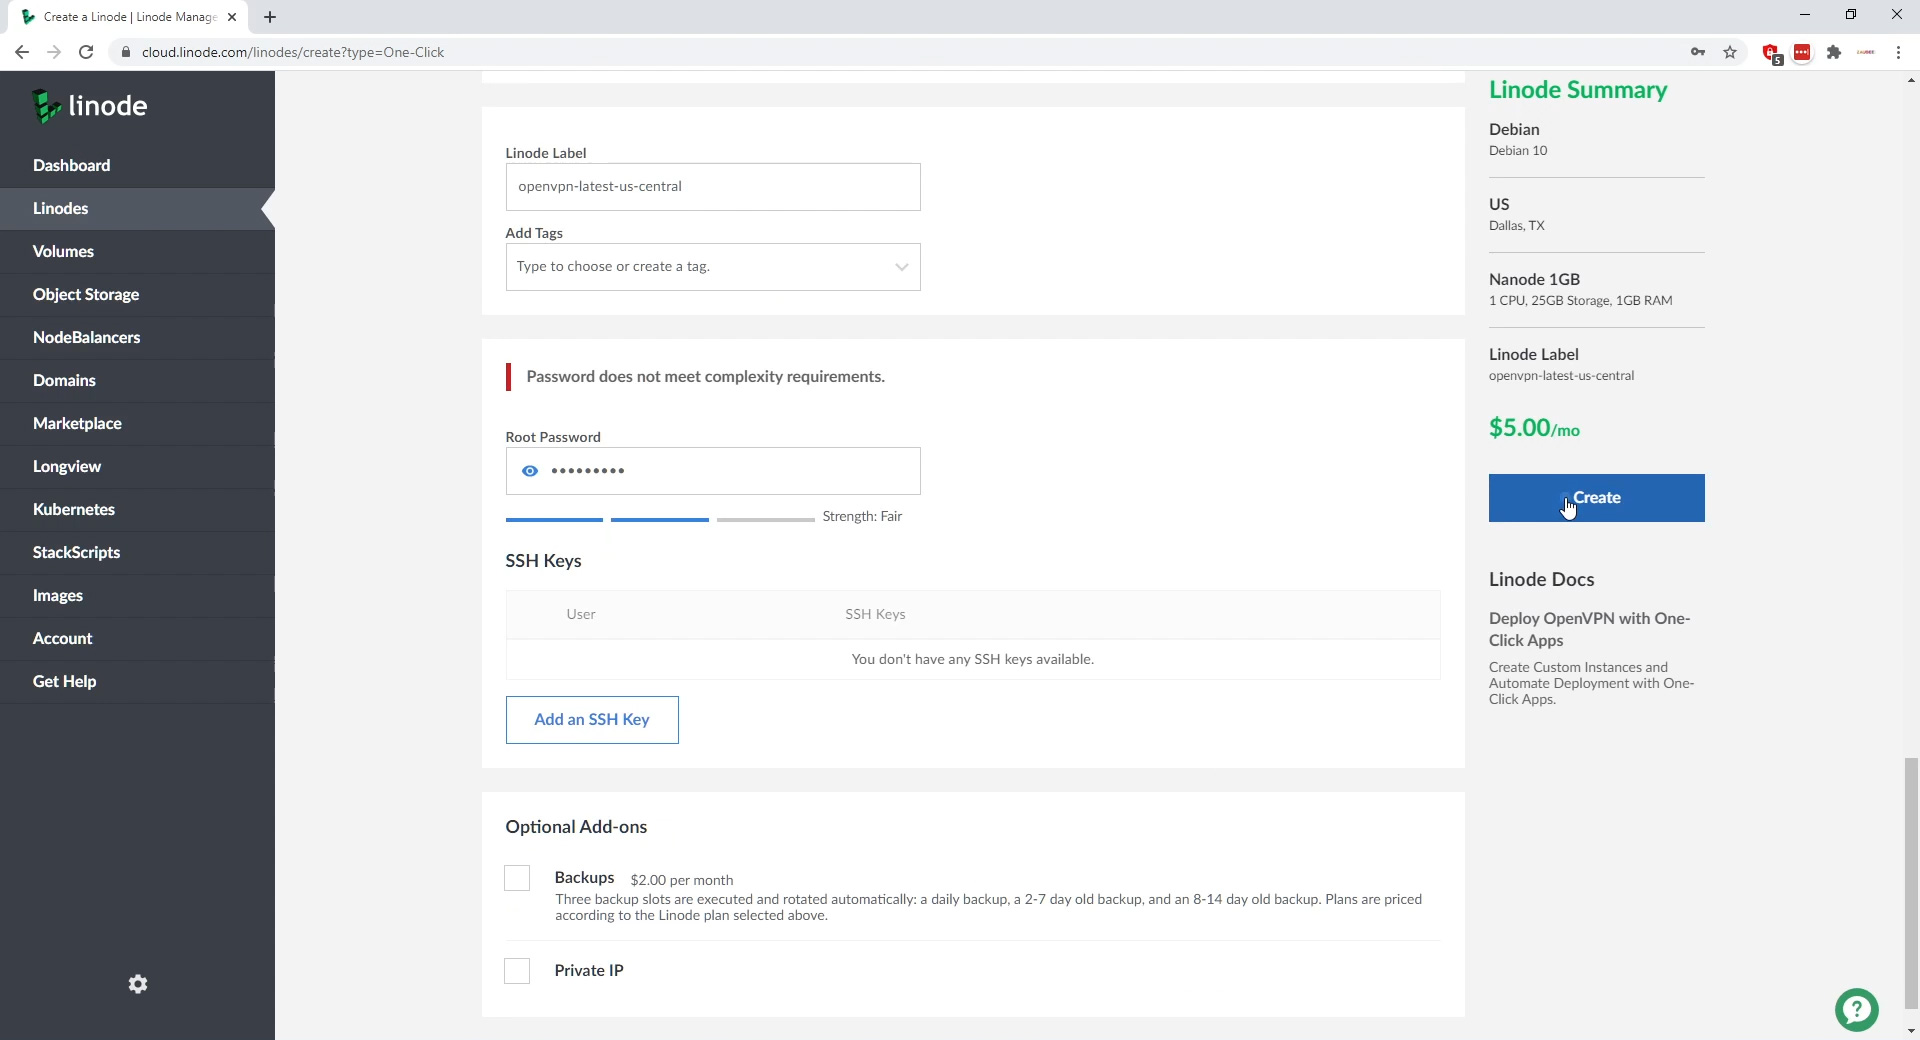
Step 8: You can set a label for your linode instance. I will keep it to the default.
Step 9: You can also set a tag, but it isn’t necessary unless you have multiple linode instances deployed.
Step 10: Finally, you will need to set up the root password for the OS to be installed on the VPS. The OS in our case is Debian, a popular linux distro. While we won’t be needing this password anhwere in this guide. I will suggest you to note it down as you might need it when you want to secure the server with https.

Step 11: Click on the Create button to set up your very own personal OpenVPN server.
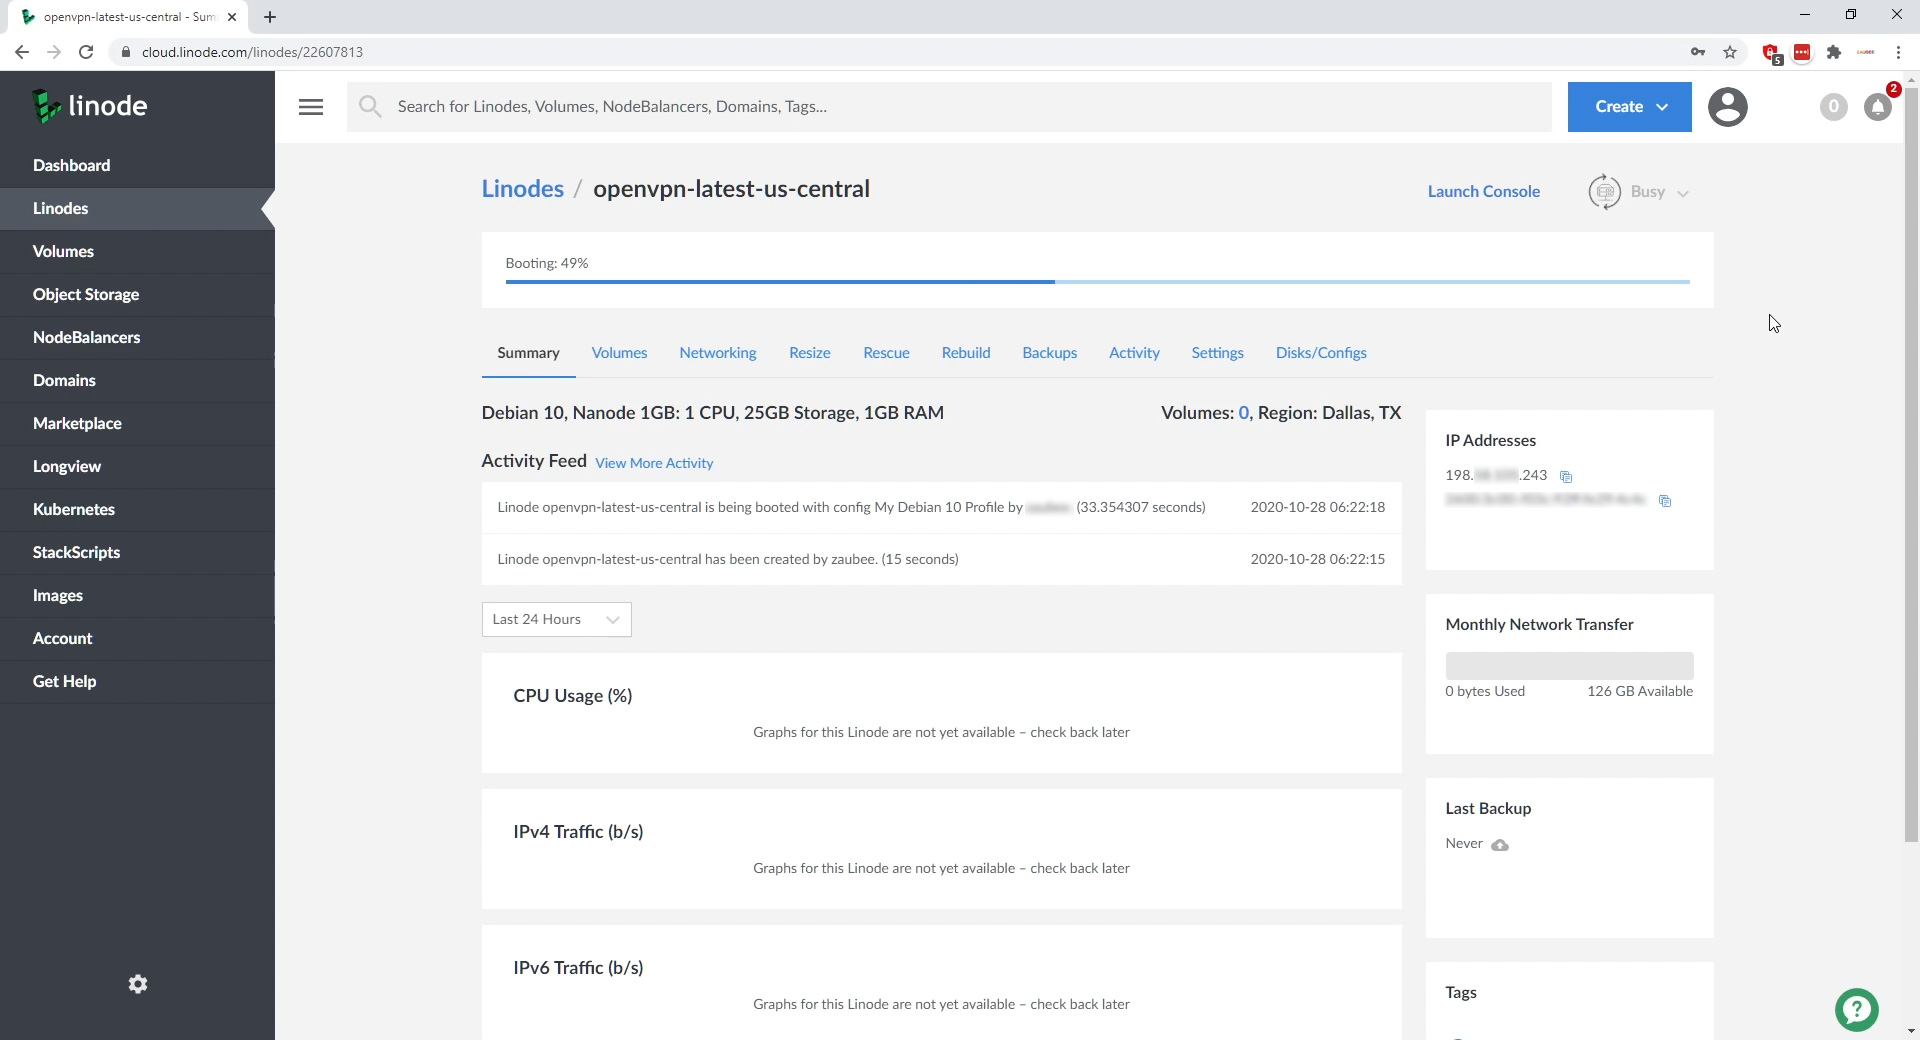
You will now have to wait a few seconds, mostly this process is completed within two minutes. Once that is done, you will be redirected to the freshly created linode summary page. The installation process for OpenVPN on linode is now complete.
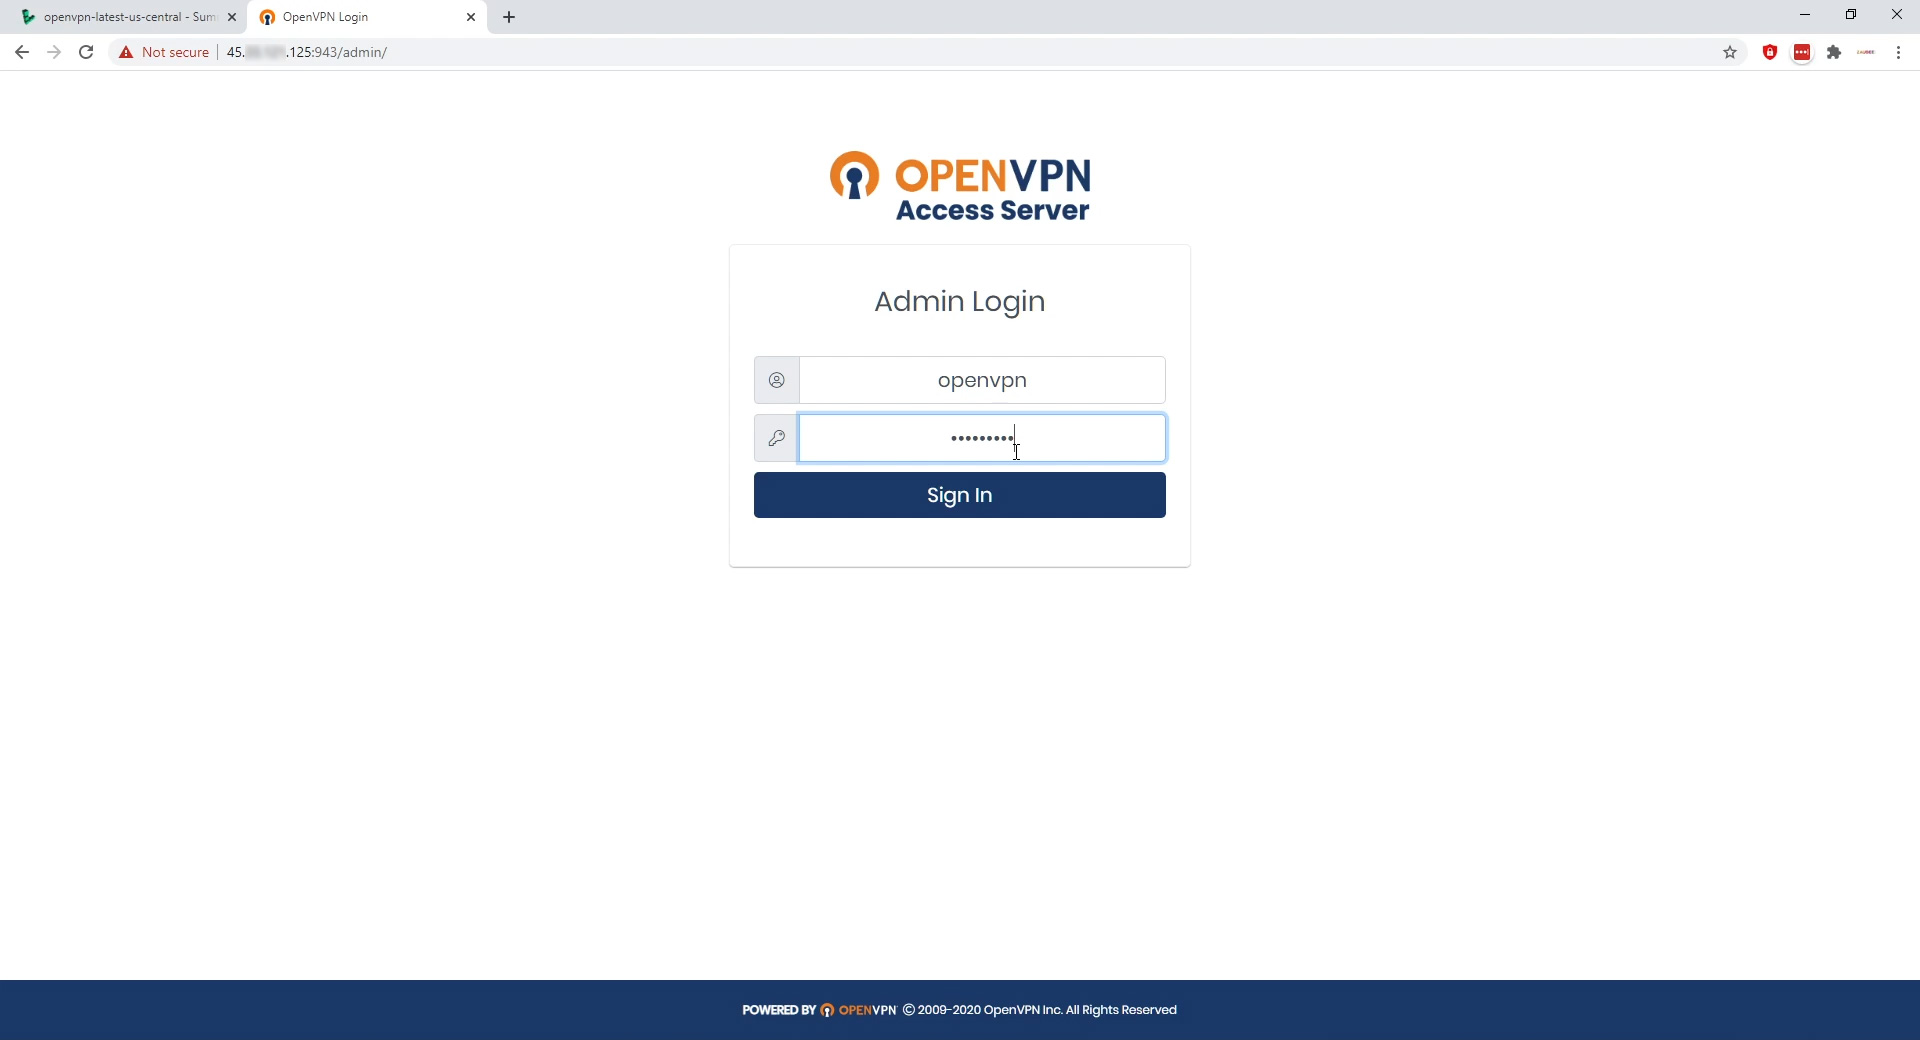
Step 12: Copy the IP address of the server and Head over to https://server-ip:943/admin ( Replace server-ip with the IP of the server ) to login into the admin panel of the OpenVPN installation on the server.
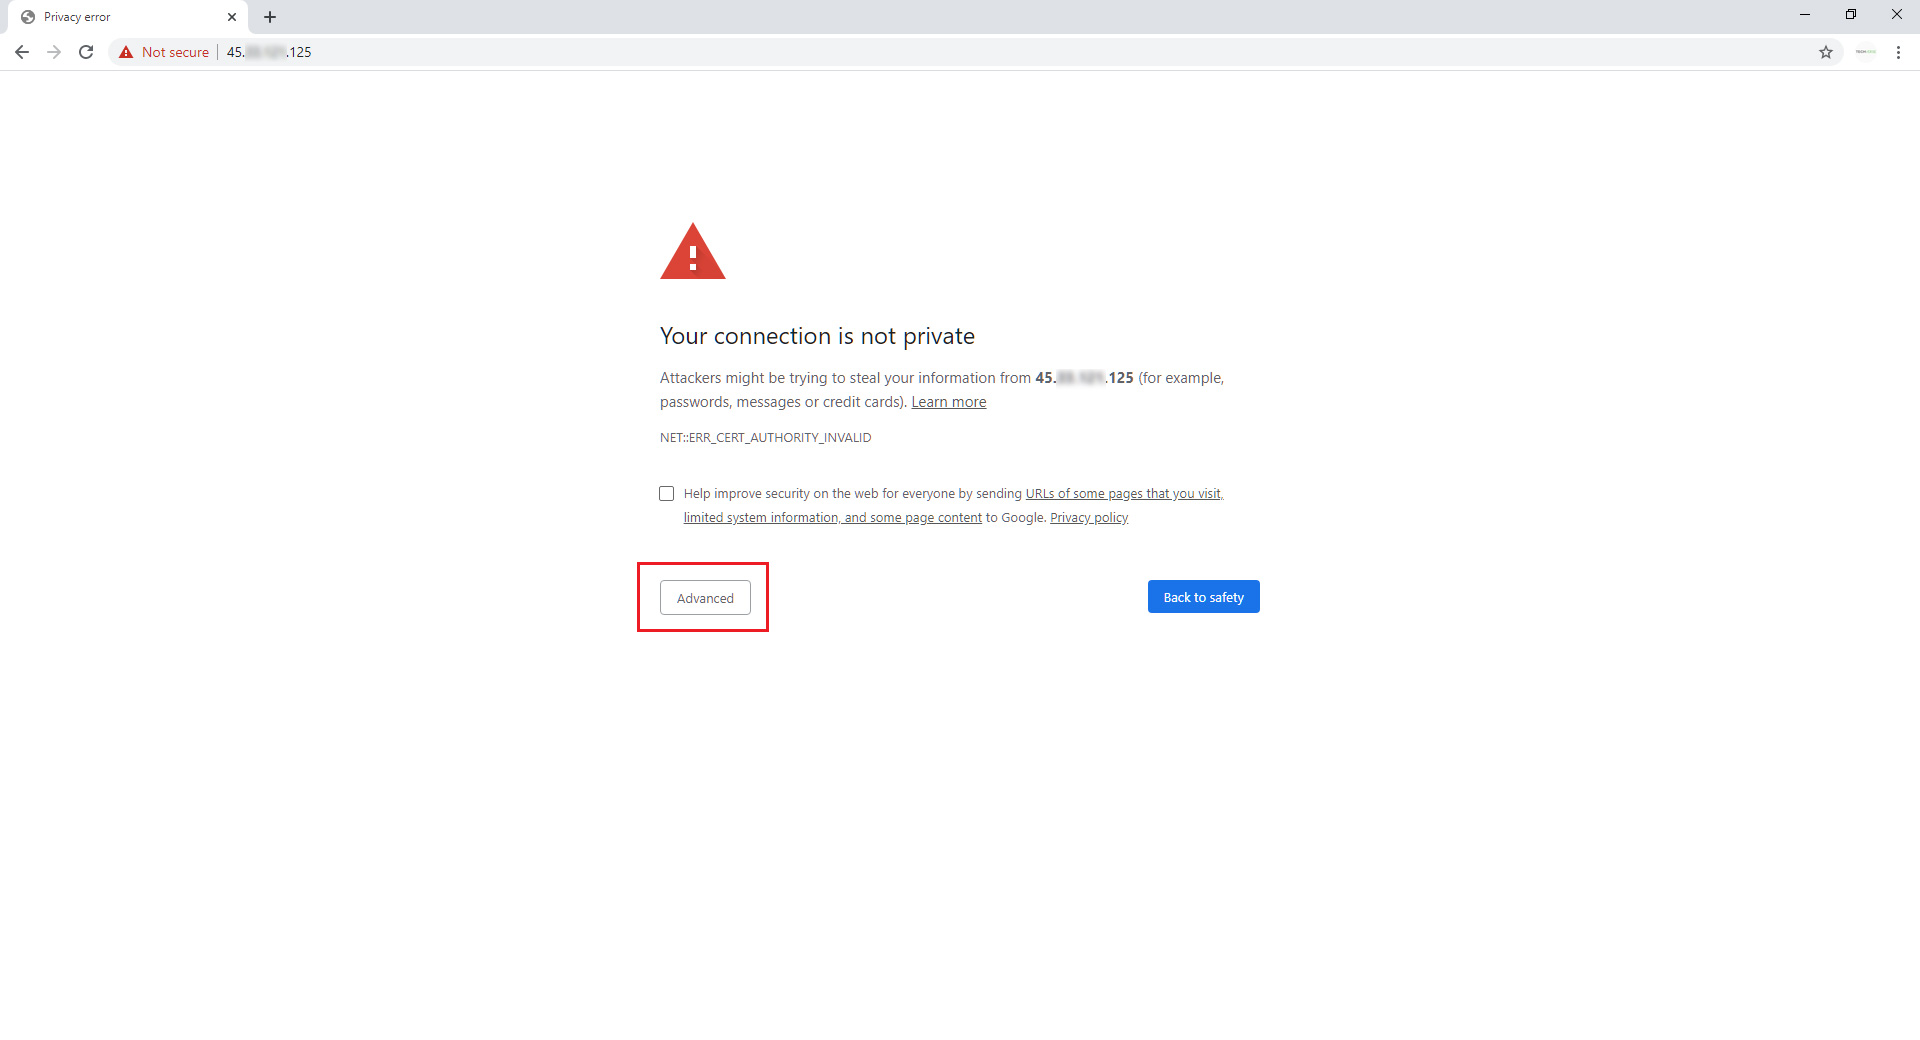
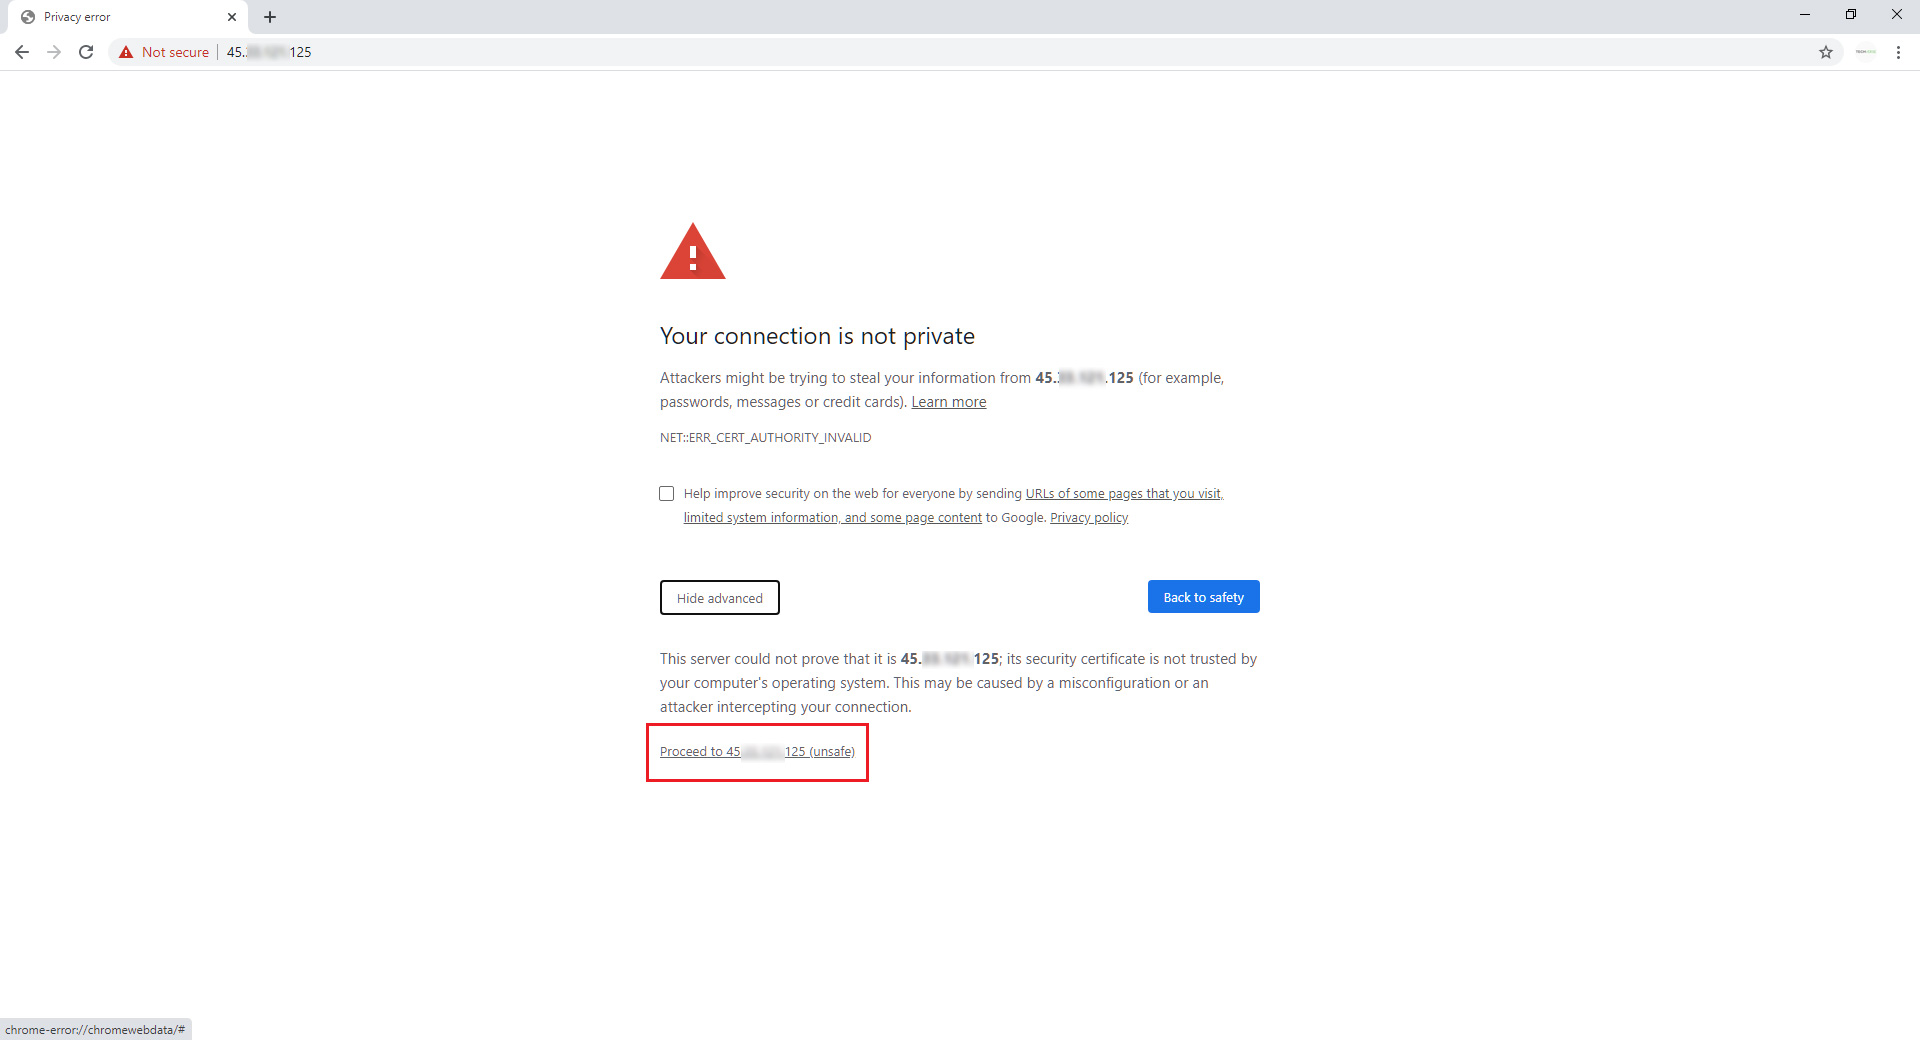
Note: Since we have not setup https, it is ok to see the following warning. Simply click on the advanced button and click on Proceed to… and you should get to the admin page.
By default the username for login will be openvpn.
Enter the openvpn as the username and the password. Click on Login to enter the admin panel of OpenVPN.
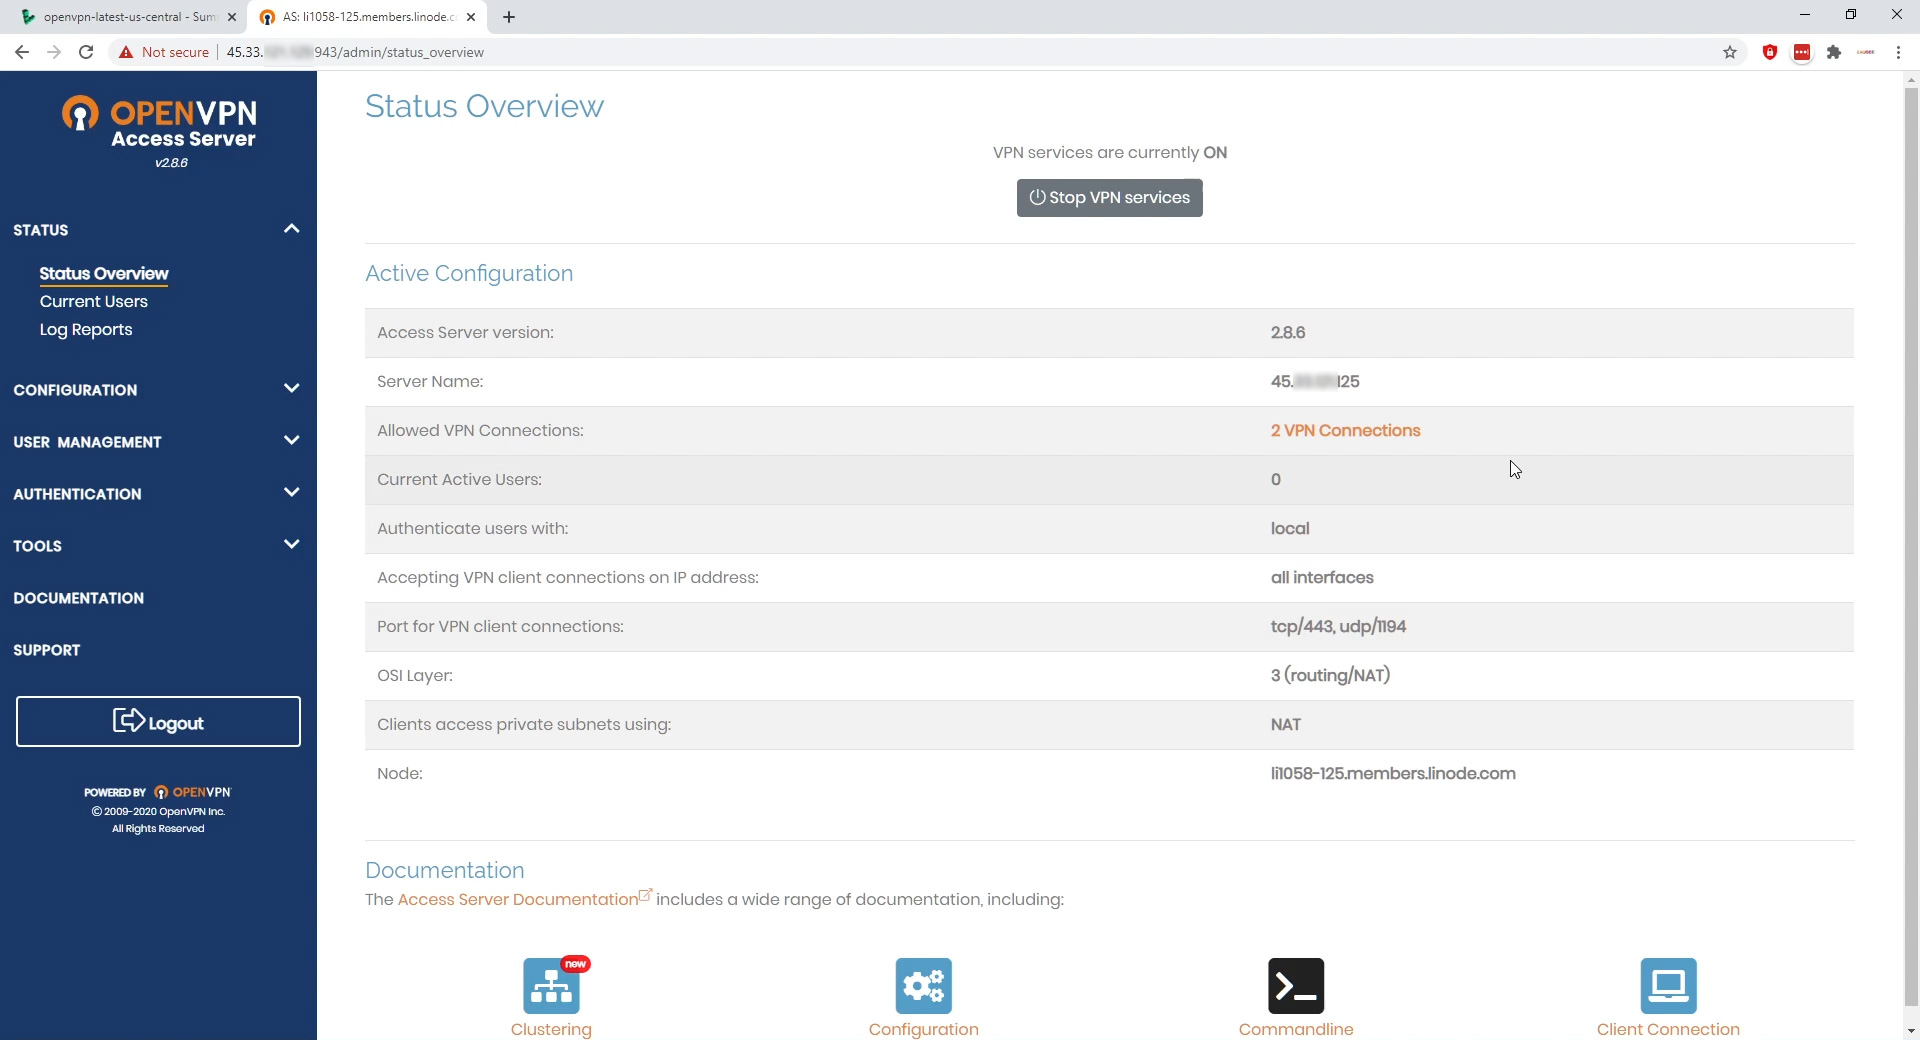
Here you can see all the details regarding the OpenVPN installation and configure it. However we are not going to touch any of these, since this guide is basically meant to install a basic installation of OpenVPN and remain user friendly.
Connecting to your personal VPN server from a PC
This is the exciting part. The OpenVPN setup is complete and now you can connect to the VPN server though a PC, Laptop or a Mobile device to access any website or service without restrictions. For this guide, I will show you how to connect to your personal VPN server from a windows PC.
Step 1: Download and install OpenVPN Connect and run it.
Step 2: Right click on OpenVPN connect from the hidden icons and click on import.
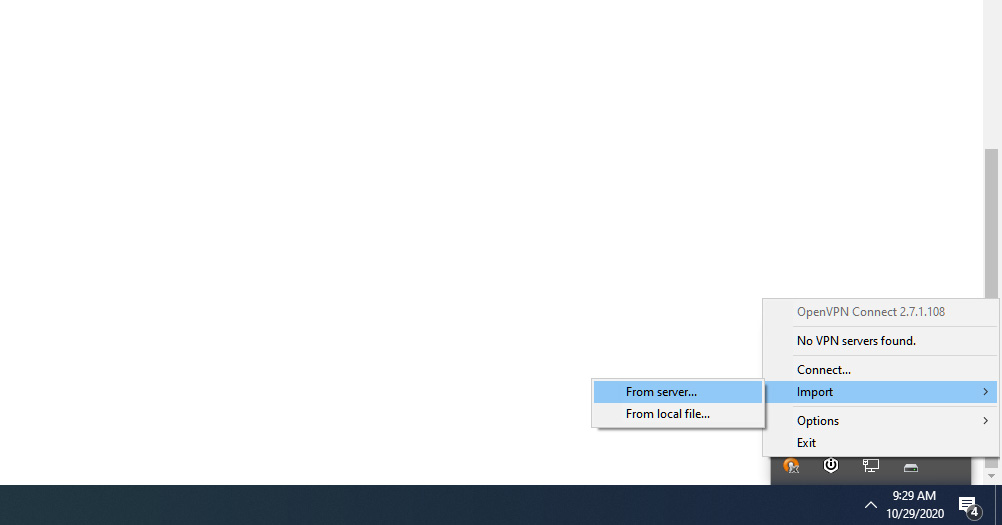
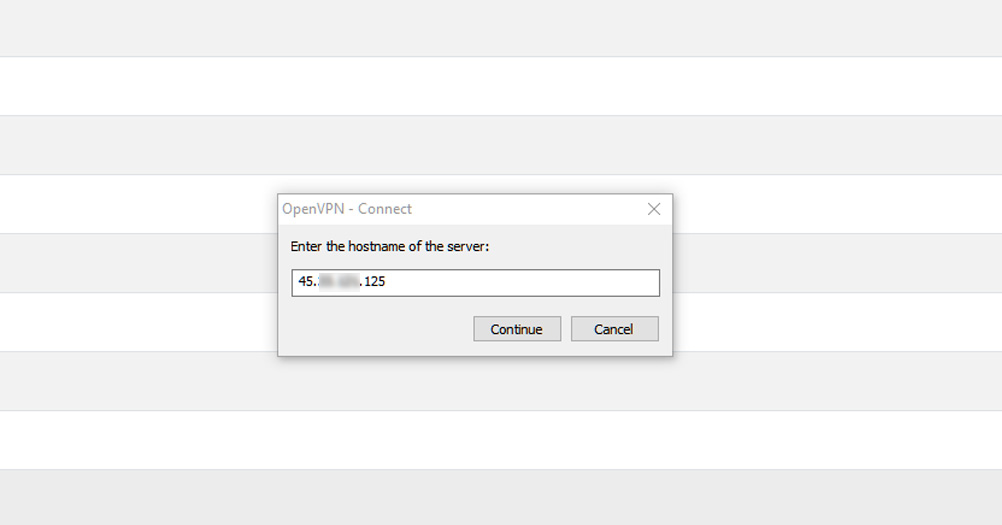
Then select from the server and enter the ip address of the VPN server when prompted.
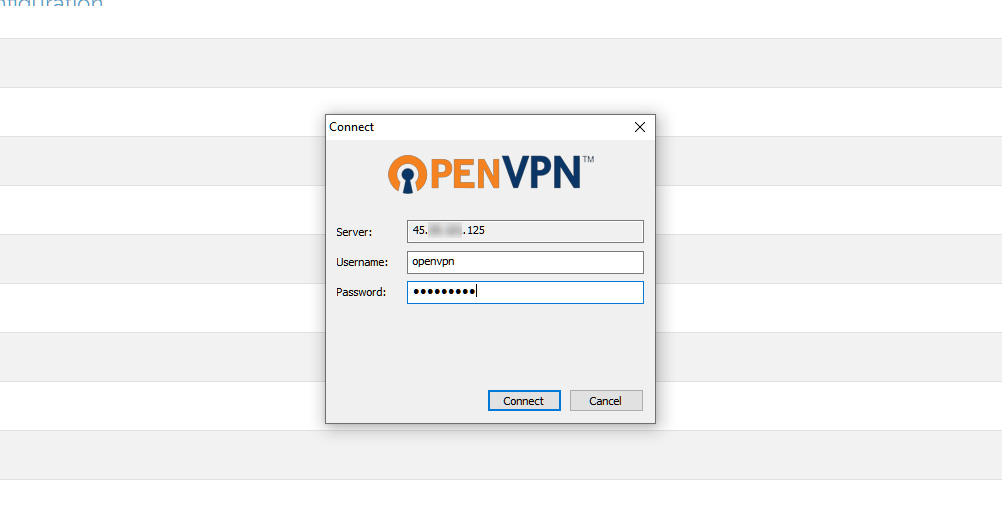
Next enter the username as openvpn and the password as you had set before for the OpenVPN installation. And click on connect.
The login details to your personal VPN server will be saved to your PC.
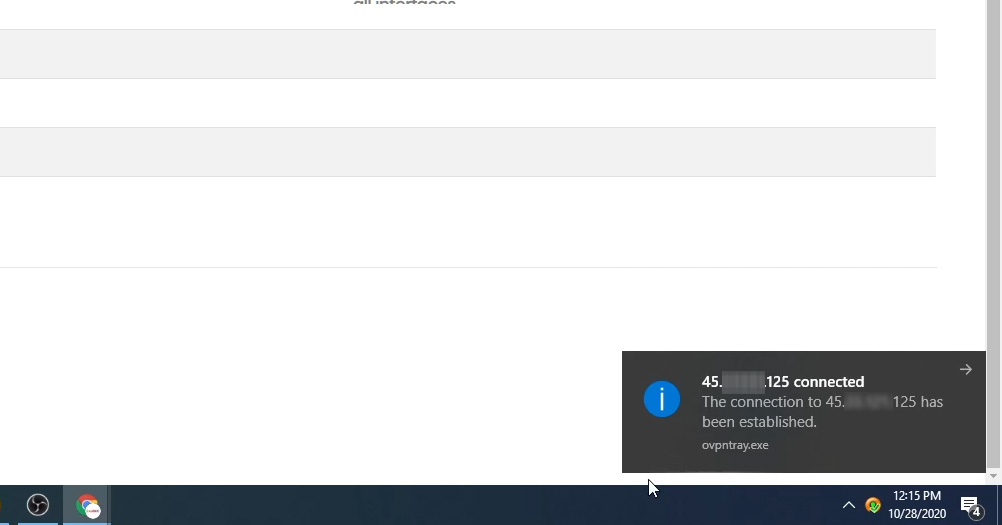
Step 3: Now right click on the OpenVPN connect icon and click on the IP address of the vpn server.

Within a few seconds you should see the following message and your PC should be connected with your personal VPN server.
By default, there is no option in OpenVPN connect to save the login credentials. But there is a way to auto connect to the VPN server. It will be covered in a separate article and will be linked from here, when it goes live.
Similarly you can also download OpenVPN connect on an android or iOS device to connect to the VPN server.
The OpenVPN server will only support two VPN connections at max. Which should be fine for personal use, given you can use it on a PC and a mobile device at the same time. If you want more connections, you will have to go for a paid subscription.
As for privacy, this installation process will store logs. However since the logs stay on the server, nobody will be able to access it apart from yourself. These logs can be manually deleted from the OpenVPN admin panel. So if you don’t want to keep logs, make sure you delete them periodically.
A video guide of the entire process will be posted to our YouTube channel shortly. So make sure to subscribe to our YouTube channel to get notified when the video goes live.
This was by far the easiest method to set up a personal VPN server using OpenVPN. Hope you got it working and if you didn’t, leave me a comment below and I will try my best to help you out.