Most of us will be already familiar with the print screen technique of taking screenshots on windows, but there is another easier way of taking screenshot in windows and not many of us know about it.
I am talking about the Snipping tool in windows. The snipping tool, as the name suggests is a built in tool in windows 7 and above versions which can be used to take screenshots of a selected area. As you might already know the print screen method of taking screenshot captures the screenshot of your entire desktop and if you only need a specific portion of the screenshot, you will then have to crop it out using a photo editing software.
The Snipping tool on the other hand can be used to directly select and capture any portion of your windows screen and thus it eliminates the need of any photo editing tools to crop out screenshots. This makes the sniping tool a much better alternative for taking screenshots on windows. Here is how you take screenshots using the Snipping tool in windows.
How To Take Screenshots of a Selected Area on Windows
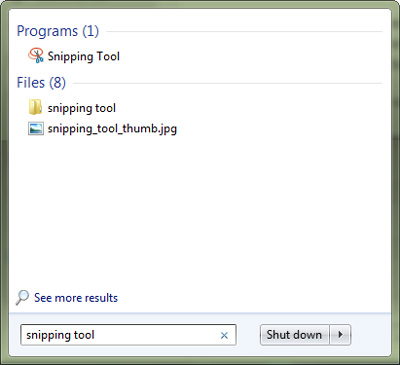
- Step 1: Click on the Start button in Windows and search “Snipping tool” in the search bar. From the search results click on the Snipping tool at the top.
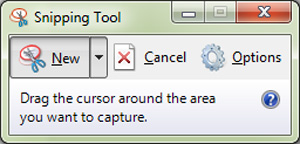
- Step 2: Next the Snipping tool will pop up on your screen, which will look like this:
- Step 3: Click on New to capture a screenshot. Hold and select a portion of the screen which you want to save as a screenshot and when you are done selecting, release the mouse button and a preview of the captured screenshot will appear in the Snipping tool.
- Step 4: Click on the floppy icon to save the captured screenshot.


