Songs downloaded from Apple music or iTunes come with a DRM protection. If you are wondering what DRM is, DRM stands for Digital Rights Management. It is a technology that prevents unauthorized redistribution of digital media and restricts the ways consumers can copy the content they have purchased.
But if you need to copy DRM protected files, you can do that for personal usage and that is completely legal. I have seen Apple music users looking for solutions to bypass the DRM protection and share their music library with their other devices. As long as you want to do this for personal use, it’s completely legal and I am going to show you how.
The problem with most subscription based music services is, you are allowed to download songs from their catalog until you are subscribed to their service. Once you choose to unsubscribe or stop using their service, all your downloaded songs will be gone and there goes months of your hard work on those amazing playlists you had curated. I have faced this before and I don’t want any of you to lose your curated playlists as i did.
But before that happens, you can simply use tools like the Tuneskit Audio converter for Mac to convert those DRM protected songs from Apple music and store it for personal use. With the help of Tuneskit Audio converter, you can convert Apple music into Mp3, Wav, AAC, FLAC and many more formats.
In addition to conversion of music, the TunesKit Audio Convert also allows you to customize the output music files, such as changing the volume, speed, pitch, set the codec, channel, sample rate, bit rate, etc. Adding to that, it can help you cut the long music files to small pieces either by time, chapter or segments, so that you can choose the exact part of your music to play without any problem.
For those who want to convert DRM protected music files, here’s how you can use Tuneskit audio converter tool to convert DRM protected music from Apple play, Itunes, Audible and many more online music services.
How to convert DRM protected music files from Apple music with Tuneskit Audio converter
Head over to : Tuneskit Audio Converter to download it and install it on your system. We are doing this on a mac, but the options are almost the same for the windows version.
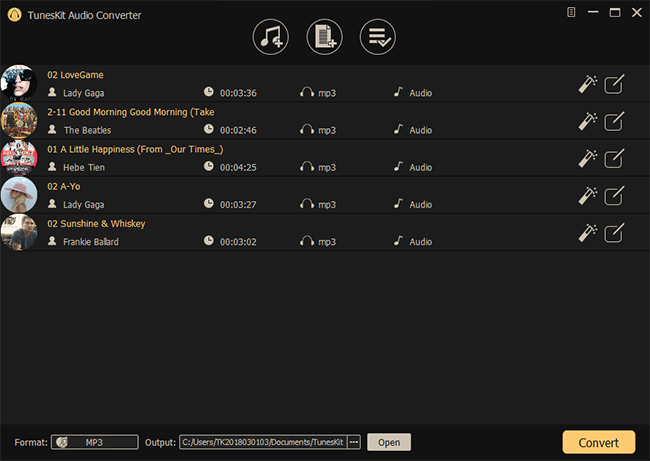
Step 1: Once installed, you can run the tool and select the files you want to convert.
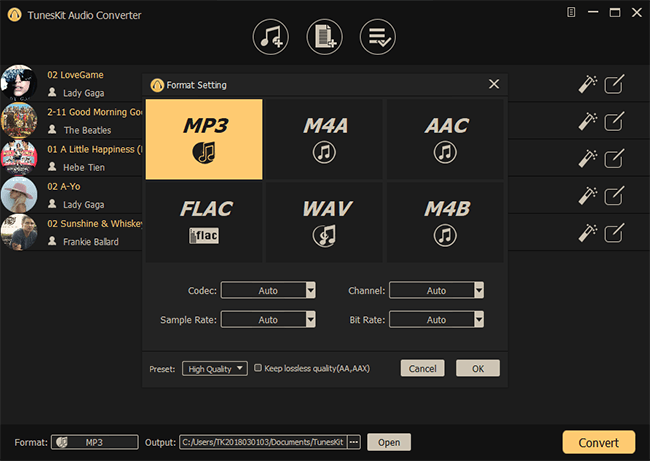
Step 2: Once the files have been imported into the tool, you can choose the output audio format and various other parameters such as codel, channel, sample rate and bit rate for the converted music. But if you don’t want to mess with those settings, you also have the option for presets to make things much simpler.
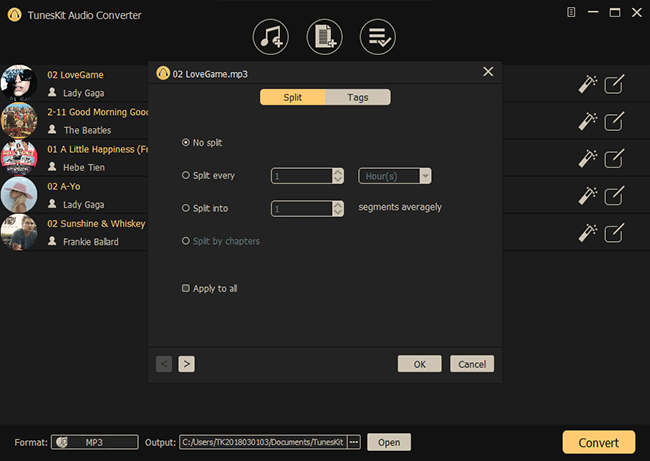
The tool also allows you to trim music tracks, if you need to use that click on the magic wand icon to view the settings.
Step 3: Finally click on convert to start converting the music files.
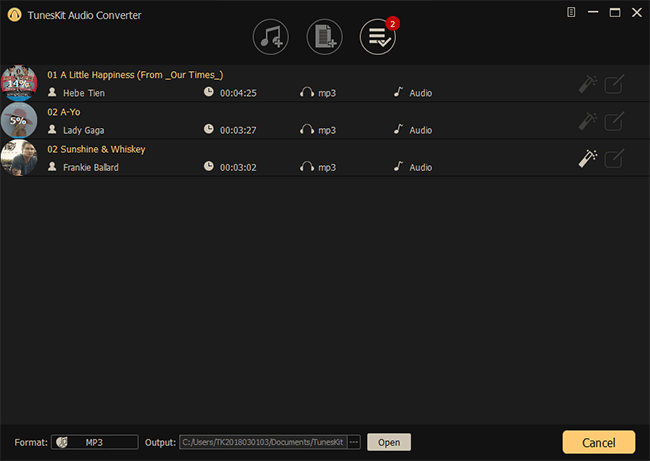
There you go, with just three steps, your entire music catalog will be converted into drm free music that can be played on other devices.
For your convenience, i have also included a youtube video of the entire process below”
Among the other nift features, the TunesKit Audio Converter also comes with an option for you to edit the ID tags info of the audio files, including title, album, artist, composer, copyright, year, genre, cover and more. With this, your music will be more organized. This comes really handy if you are as organised as me when it comes to music.
The Tuneskit Audio converter is available for both Windows and Mac operating systems. While it is a paid tool, you can first download the free trial to test out its features and performance and then buy the paid version if you are satisfied.
The best thing about the paid version of this tool is, it is offered with a life time update policy. So once you purchase it, you don’t have to worry about missing out on any future updates. And if you come across any problem, you can contact their 24 X 7 online assistance for a quick solution.
To sum it up TunesKit Audio Converter is a superior audio converting software. It comes with all the best features for handling audio files such as download protected files, convert audio formats, customize playback settings and so on. No matter what you need to do with your audio files or what kinds of music you have, you can always use this smart tool to help you quickly and reliably.
Note: Do not convert music from a low quality format to high quality format. The resulting music quality will be very bad. For example: Mp3 to FLAC conversion is strictly not recommended.
Finally take a look at the system specs and other requirements of the tool below:
System & Hardware Requirements for Windows
Operating System: Windows XP, Vista, 7, 8, 8.1, 10 (32-bit & 64-bit)
Processor: 1G Hz processor, or above RAM: 512MB or higher of RAM
Monitor: Monitor with 1024×768 pixels or higher resolution
Other: iTunes 12.10 or lower
System & Hardware Requirements for Mac
Operating System: Mac OS X 10.8, 10.9, 10.10, 10.11, 10.12 Sierra, 10.13 High Sierra, 10.14 Mojave and 10.15 Catalina
Processor: 1G Hz processor, or above
RAM: 256M or higher of RAM
Monitor: Monitor with 1024×768 pixels or higher resolution
Other: iTunes 12.10 or lower
Supported Input Formats Special Audios: Apple Music, iTunes M4B, M4A, iTunes M4P, Audible AA, AAX
Common Audios: M4A, M4B, M4P, M4R, MP3, M4A, MP2, MPA, WMA, AAC, AC3, MKA, OGG, AIFF, RA, RAM, WAV, APE, FLAC, AA, AAX, etc.
Supported Output Formats Audio Formats: MP3, AAC, M4A, M4B, WAV, FLAC
If you have any queries, feel free to post them below in the comments.