Batch resizing multiple images in Photoshop CS5 is a very easy task . Photoshop has an built in image processing script for this purpose . With the help of this script we can easily convert and resize multiple images to smaller sizes . These resized images would be small is resolution and in storage size , which would be very convenient to upload onto the internet .
This method of resizing photographs can be very useful when it comes to resizing a lot of photographs at once . Photographs from birthdays , marriages and vacations can be fun to click but when it comes to sorting the good ones , its a tedious and time taking process .Further if you have a slow internet connection , uploading these photos onto the internet would be another challenge . This is where batch image resizing comes into help . You can follow the instructions below and learn to batch resize multiple images in Adobe Photoshop CS5 .
Note: Please organise all the photographs in a single folder , before you process with the instructions .
Instructions to Resize multiple / batch images in Photoshop CS5
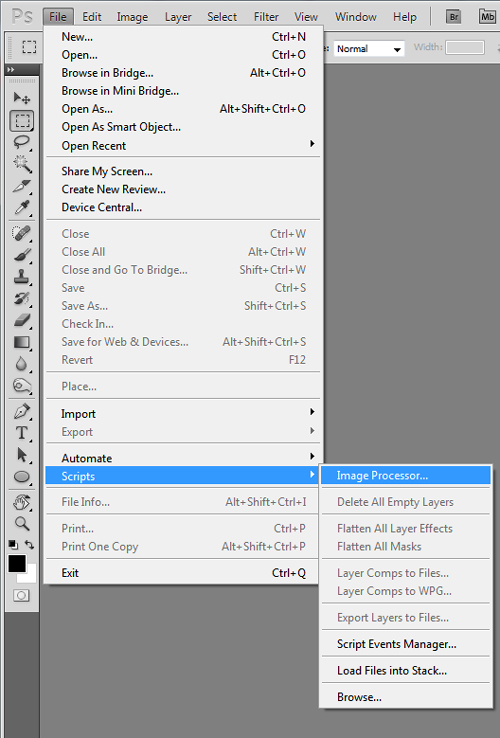
- Step 1: From Photoshop menu bar , select File > Scripts > Image processor .
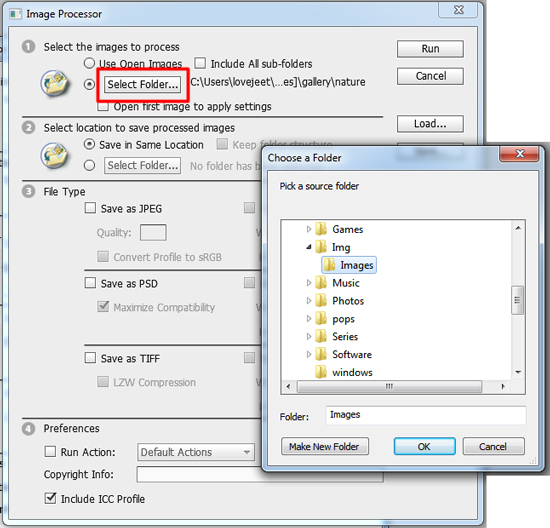
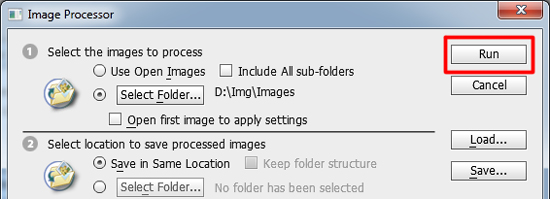
- Step 2: There are two methods by which you can convert and resize multiple images in Photoshop . you can either select “ use open images “ and use images already opened in Photoshop and resize them or select “select folder “ and select an entire folder to resize all the images in it . We are going to select an entire folder with images and resize them . From the dialog box click on ” select a folder ” and select the folder with the images you intent to resize .
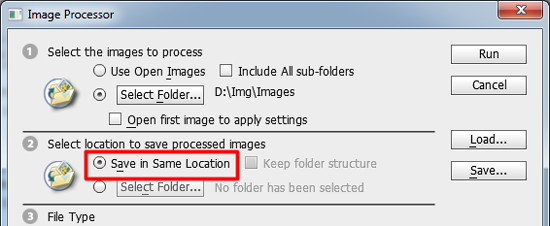
- Step 3: Select a location to save the output images . If you select “ Save in same location “ , Photoshop will save all the resized images in a separate subfolder with the original images . If you want to save the resized images in another folder , Click on ” Select folder ” to select a different folder .
- Step 4 : Specify the following details for the images to be resized .
- Output format : There are three options to save the output images files , you can either save them in Jpeg , PSD or tiff file formats . Check Jpg to resize and convert all the images into Jpg format .
- Quality : Specify a quality value from 0 to 12 . A lower value will reduce the image size and quality and a higher value will do the opposite .
- Resolution : Check “ Resize to fit “ and set a output resolution for the images to be resized or leave it unchecked for the images to maintain their original resolution .
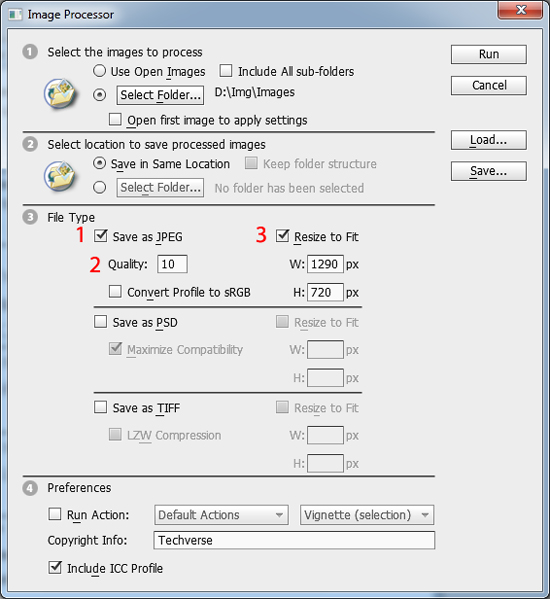
- Step 5 : Check the “Include ICC profile “ and type in your name in Copyright info . You can now click on Run to start resizing the images . Photoshop will now individually resize open and resize all the images and according to format type of the images it might take a few seconds or more to complete .
- Step 6: Once the batch resizing is completed , your images will be saved in a subfolder named “Jpeg” with the original images .
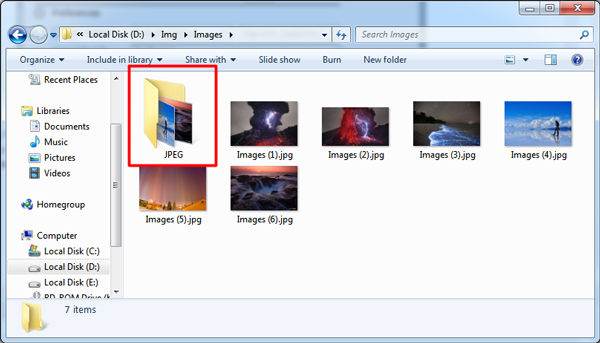
Now you can view the images and upload them to any website you would like .
can i resize and also put the resized image on a white background? like i need my images resized to fit on a 375 x 375 white background, but the image itself is not perfectly square, so i need a whole folder of them sized down to fit within that white background. does that make sense?
Hi thanks as Your technique saved a lot of time
Thank you
Thank you sooooooo MUCH!!! You have no idea how easy it was to understand your directions. You were very very very thorough! Thank you again!
you can not believe how you made my life easier with this post
Thanks
Thank you SOOO Much!