I have been using Nginx as the preferred web server for most of my web projects. It is very efficient than apache, which I used initially for my projects. It didn’t take long to find out the limitations of apache as the traffic grew.
After spending some time researching solutions, eventually, I came across Nginx. Its performance and efficiency simply amazed me. If we compare two separate installations of apache and Nginx with the same resources, Nginx would perform 10x better in comparison to apache. That’s how much-optimized Nginx comes out of the box.

When I replaced Apache with Nginx as my preferred web server. The app was now able to handle hundreds of concurrent connections per second, which was previously not possible with apache without increasing the server resources and also the cost.
As I tinkered with Nginx’s settings, it became more efficient. In a few months, I was hosting multiple websites on my server powered by Nginx without the need of increasing the server resources. Nginx helped me save a lot on web hosting costs.
Nginx has many other immensely useful features under its hood, which I will be covering in my guides in the coming days. In this post, I will show you how to host multiple websites on an Nginx server.
If you are aware, Nginx has a feature called virtual hosts. As the name suggests, this feature allows the creation of separate virtual hosts within a single server. Each virtual host is capable of serving one website.
All the virtual hosts share the resources of a single server. So multiple websites can be hosted on a single server as long as the total resource consumption of the hosts stays within the server’s allocated limit.
For example, on a server with 1 GB of RAM and 20 GB of storage space, you can host 10 static websites with low to moderate traffic. The average cost of hosting with the above resources should be $5. The cost of each virtual host comes to $0.5. The cost of hosting these 10 sites on shared hosting will be much more.
How to Host Multiple Websites on a Nginx Server
Now that we know about virtual hosts on Nginx, let’s find out how we can use virtual hosts to host multiple websites on an Nginx web server.
Before we proceed ahead, make sure you have pointed the domains to your hosting server.
I am assuming you have Nginx installed on your ubuntu server. The following are examples of two domains for which we will create the virtual hosts.
- Abc.com
- Xyz.com
First of all, we need to create the virtual host for the first domain: abc.com. We will create a virtual host file in the /etc/nginx/sites-available folder and enter the following. For this example, I will name it abc.

server {
    listen 80;
    root /home/abc.com/;
    index index.html;
    server_name abc.com www.abc.com;
    location / {
         try_files $uri $uri/ =404;
    }
}
Next, we will have to create the virtual host file for the second domain: xyz.com. It will be exactly the same as the first virtual host file. However, we will have to change the root folder location and the server names. I will name it xyz.
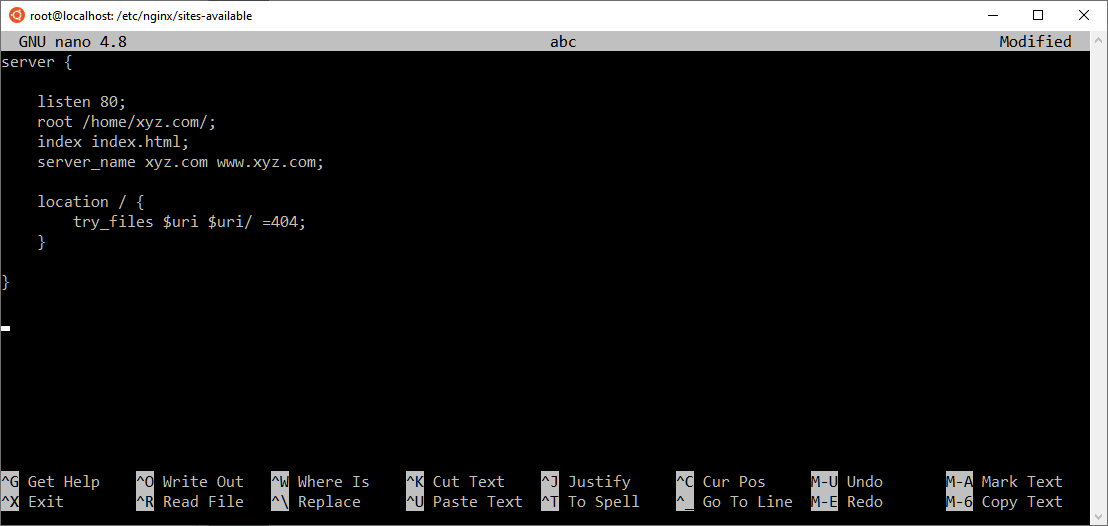
server {
    listen 80;
    root /home/xyz.com/;
    index index.html;
    server_name xyz.com www.xyz.com;
    location / {
         try_files $uri $uri/ =404;
    }
}
We have created the virtual host file for the two domains in the sites-available folder. In order to enable the domains, we will have to create a symlink for the virtual hosts in the sites-enabled folder.

sudo ln -s /etc/nginx/sites-available/abc /etc/nginx/sites-enabled/abc
sudo ln -s /etc/nginx/sites-available/xyz /etc/nginx/sites-enabled/xyz
Once we run these commands, we have to restart the Nginx server for the changes to take place. The following code will restart the Nginx server.

sudo service nginx restart
This should make the domains live, given you have already pointed the domain names to the hosting by updating the nameservers or A records.
You can now enter the domains in the browser and each domain should load from the respective root folder. You can now go ahead and install letsencrypt to enable HTTPS on both domains.